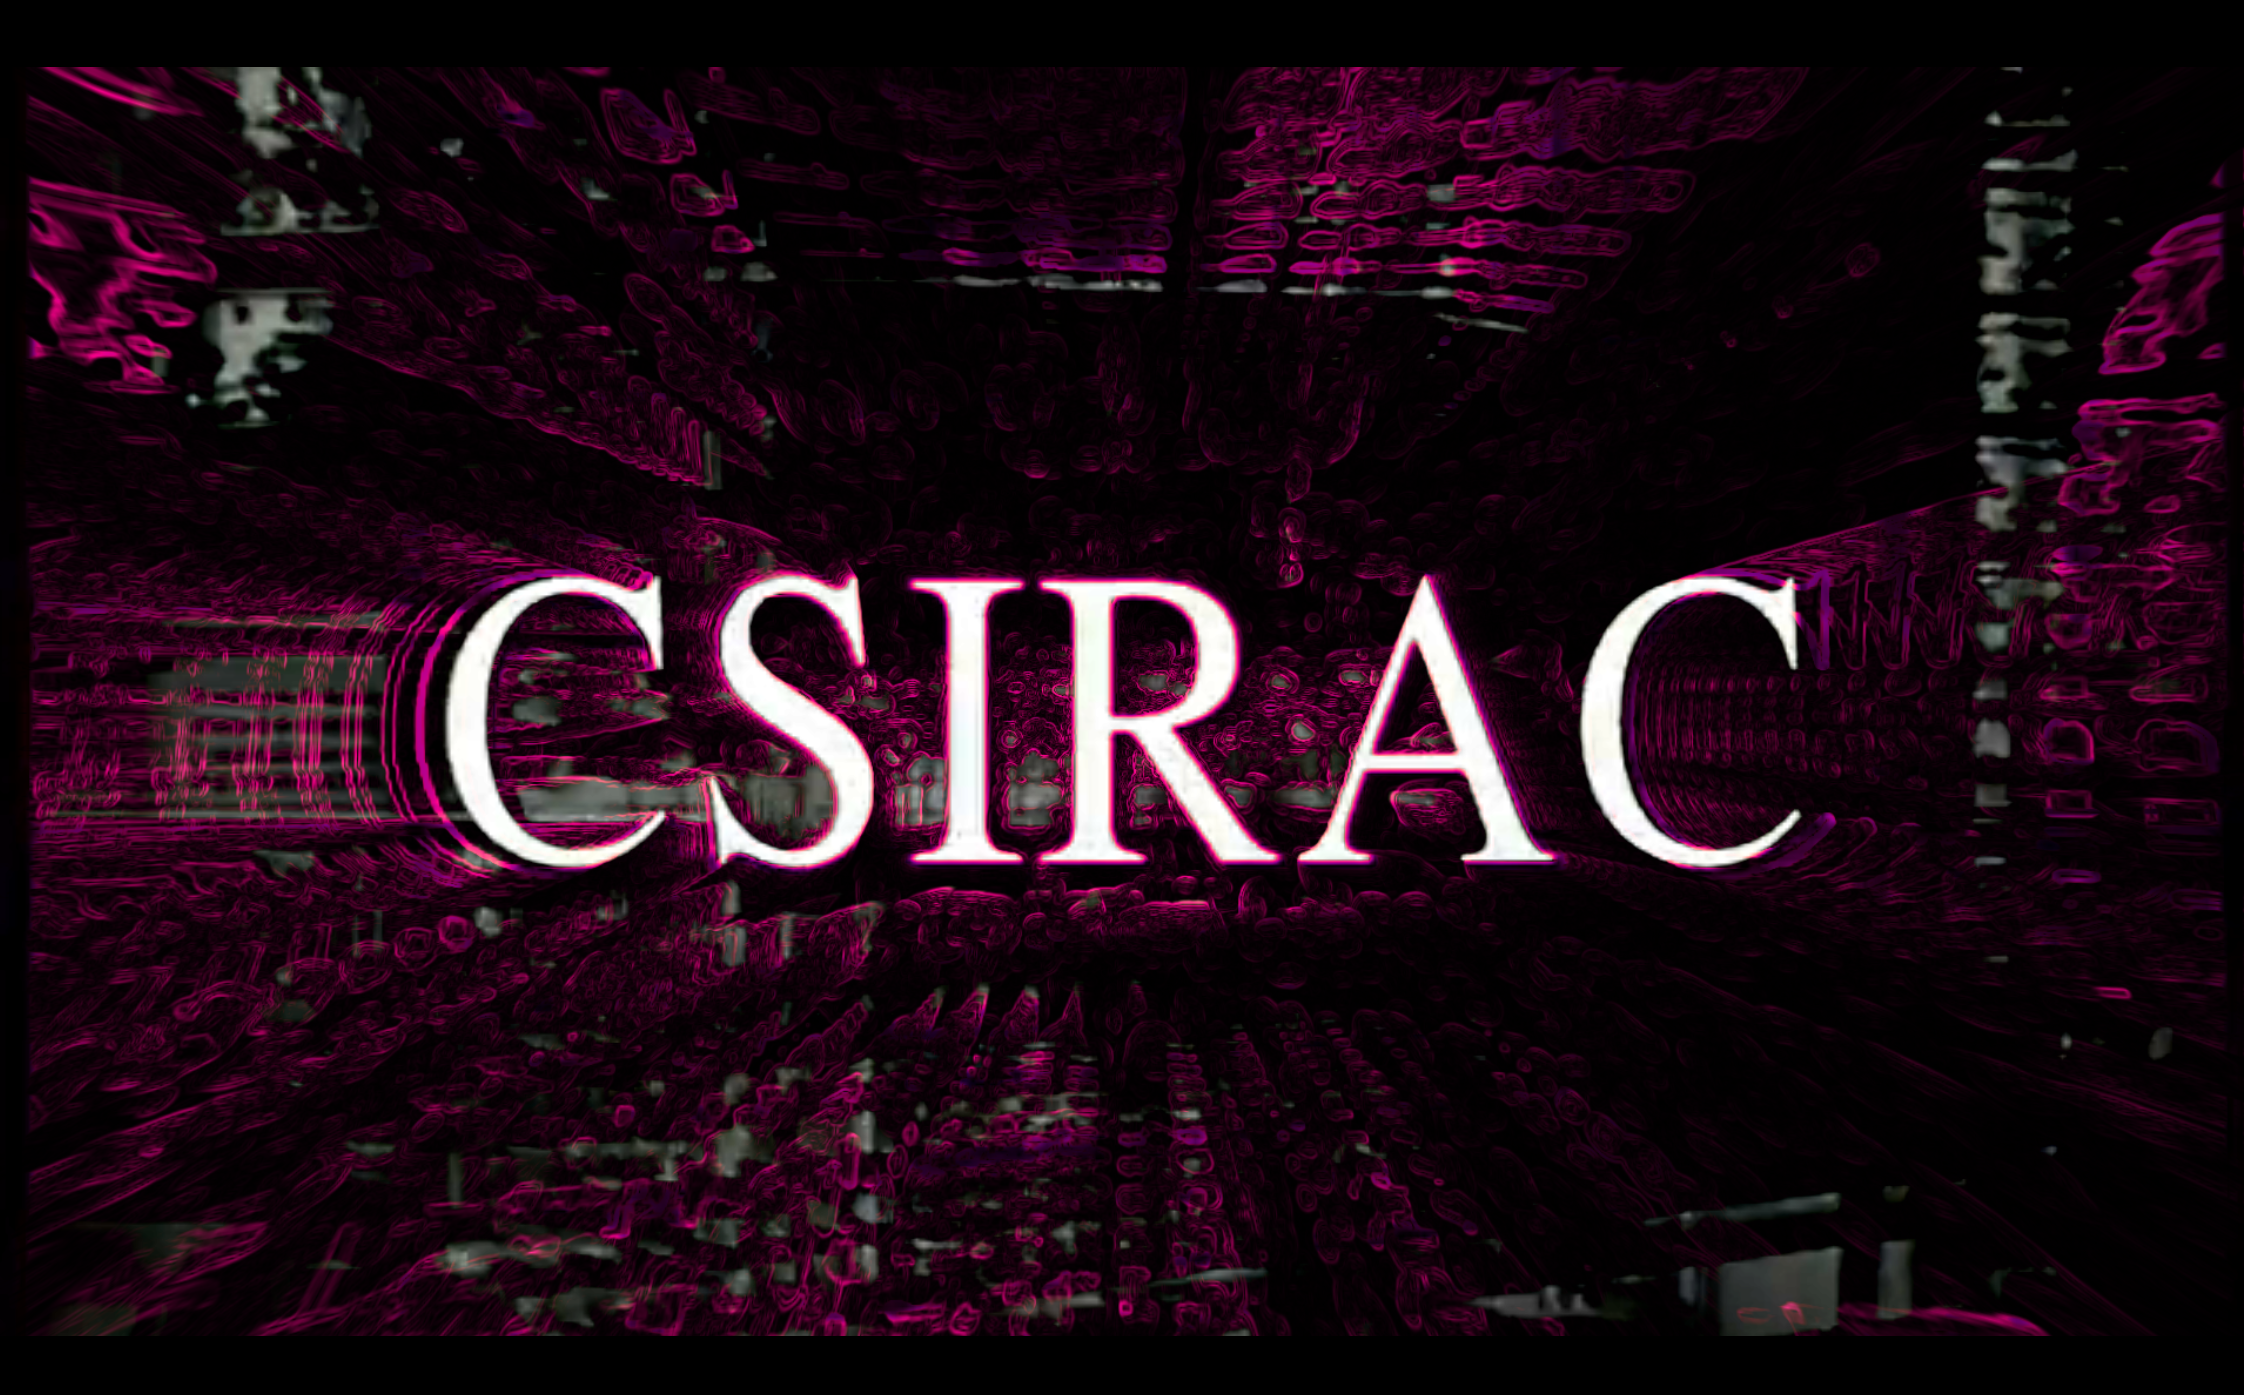
To practice using MIDI input with TouchDesigner for the first time, I chose to create a visual for "CSIRAC" by Ninajirachi (from her album "I Love My Computer"). The main visual is an alternating series of video clips (primarily stock footage), to which the MIDI input applies various visual effects.
live MIDI input applies visual effects to the video clips
Video clip sources:
- CSIRAC - The First Computer to Play Music (documentary)
- https://www.pexels.com/video/a-cowboy-rides-his-horse-through-the-dust-26623003/
- https://www.pexels.com/video/time-lapse-footage-of-vehicular-and-people-traffic-in-a-city-street-at-daytime-2697636/
- https://www.pexels.com/video/a-pedestrian-traffic-light-turning-green-from-red-5665107/
- https://www.pexels.com/video/digital-printing-855469/
- https://www.pexels.com/video/a-couple-in-a-park-overseeing-sydney-city-skyline-and-the-opera-house-3209971/
- https://www.pexels.com/video/an-old-component-sound-system-2000539/
- https://www.pexels.com/video/classic-turntable-with-vinyl-record-playing-2112426/
- https://www.pexels.com/video/fallow-deer-2355106/
- https://www.pexels.com/video/bear-in-the-river-857097/
- https://www.pexels.com/video/grass-land-maintained-as-pasture-land-for-livestock-farming-3214449/
- https://www.pexels.com/video/a-school-of-fish-swimming-in-an-aquarium-2556513/
- https://www.pexels.com/video/scenic-train-journey-through-countryside-fields-34759849/
- https://www.pexels.com/video/electrical-pole-856966/
For the TouchDesigner setup, I primarily used the pad buttons to switch effects off and on (0/1). The only knob I used was to change the amount of pixelation effect applied (0 to 1). Below is a brief breakdown of the TouchDesigner network:
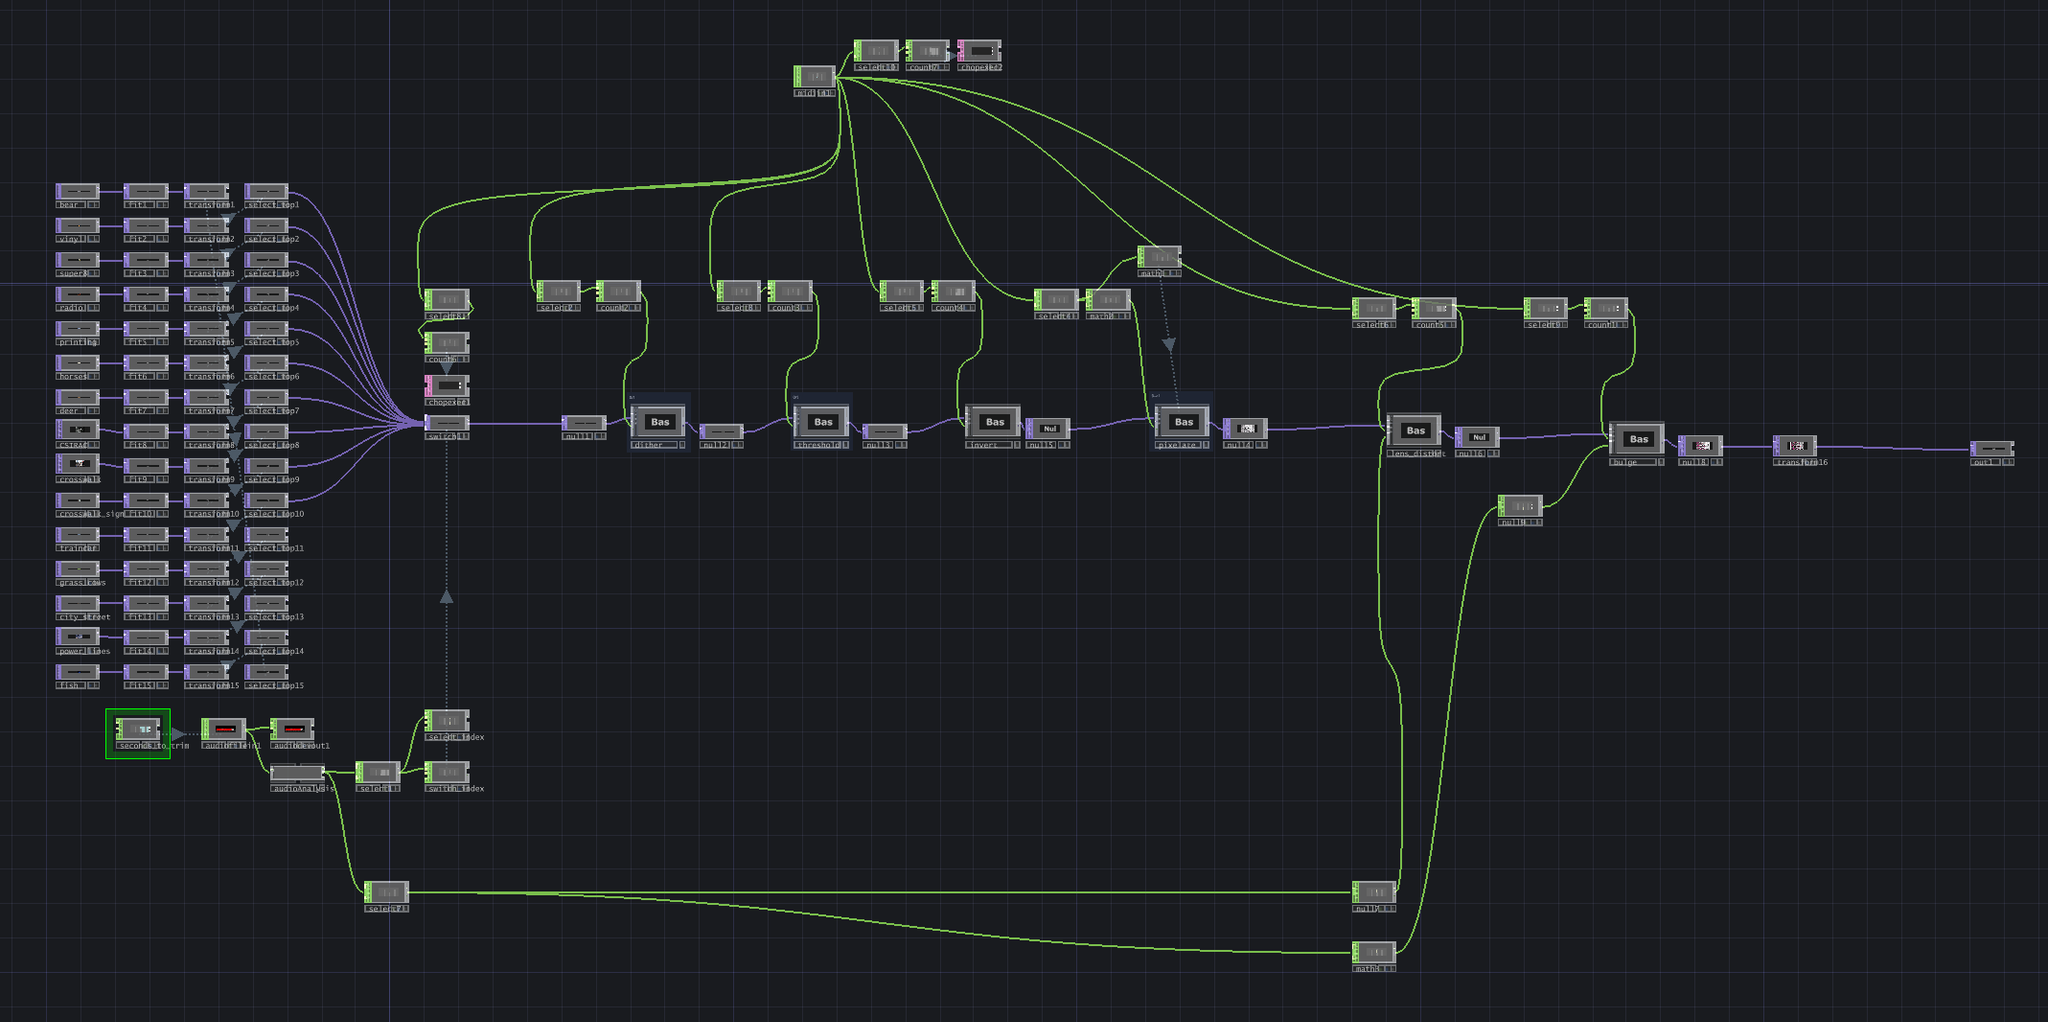
The full network runs pretty slowly -- it's fine in performance mode, but has issues when I'm looking at the network itself. I'll have to find ways to make this more efficient in the future.
Let's dive into some of the details.
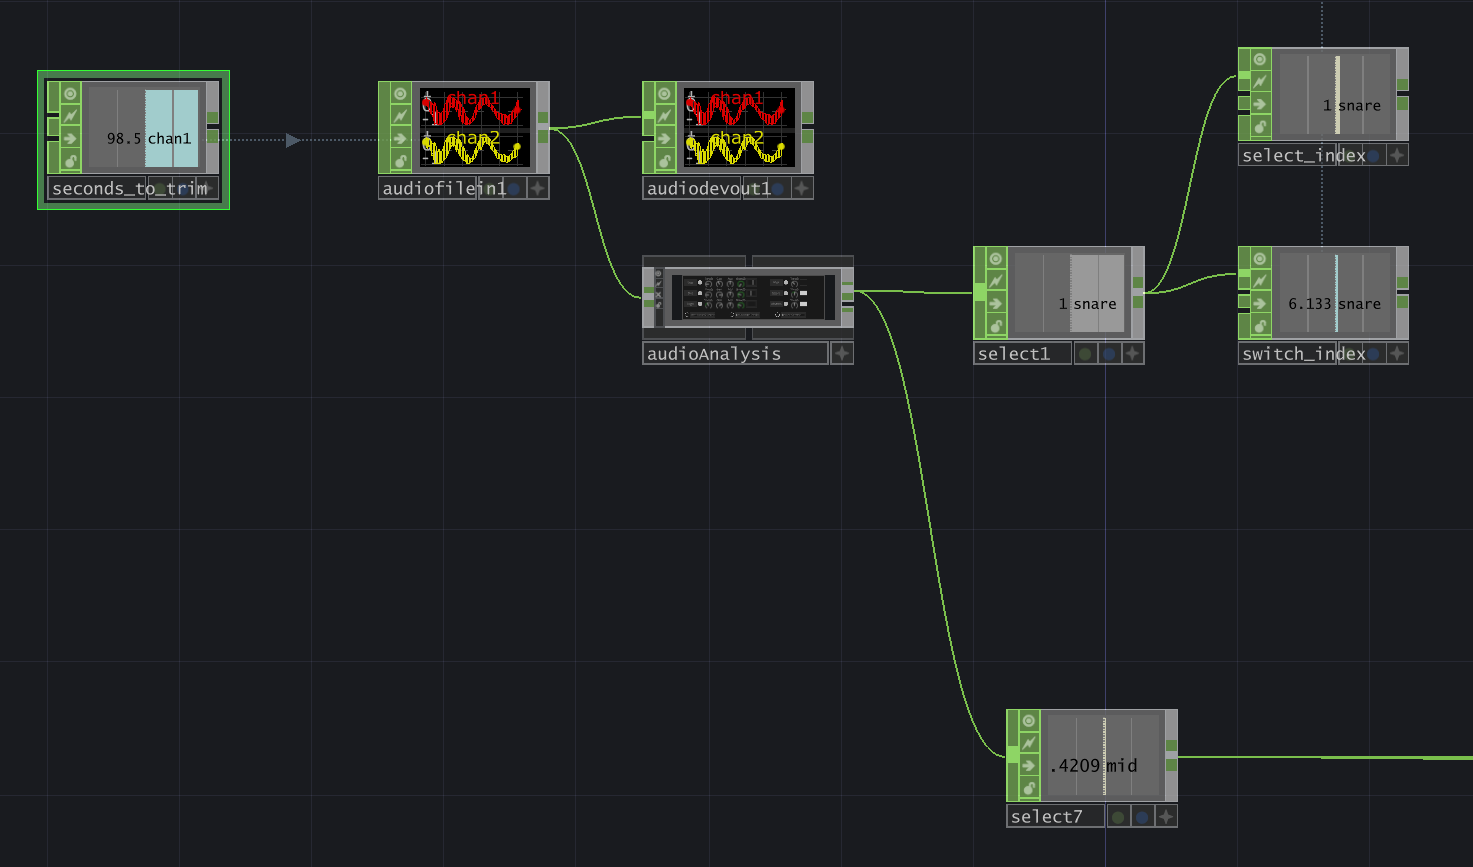
For the audio, I pulled it in using an audiofilein CHOP, setting Play Mode to "Specify Index" and using a constant CHOP (seconds_to_trim) to adjust the Index using an expression:
1(me.time.frame / root.time.rate) + (op('seconds_to_trim')['chan1'])
This makes it very easy to play around with how much I want to trim the beginning of the audio file.
Next, I pulled it into an audioAnalysis operator (from the TouchDesigner Palette) and extracted two channels:
- snare: this pulses between 0 and 1, which makes it great for my switch input (to switch between video clips) and changing my select TOPs (to vary the order of the clips).
- mid: this channel was very affected by the most intense part of the song, making it great for audioreactivity in my lens distort effect and pulsing effect.
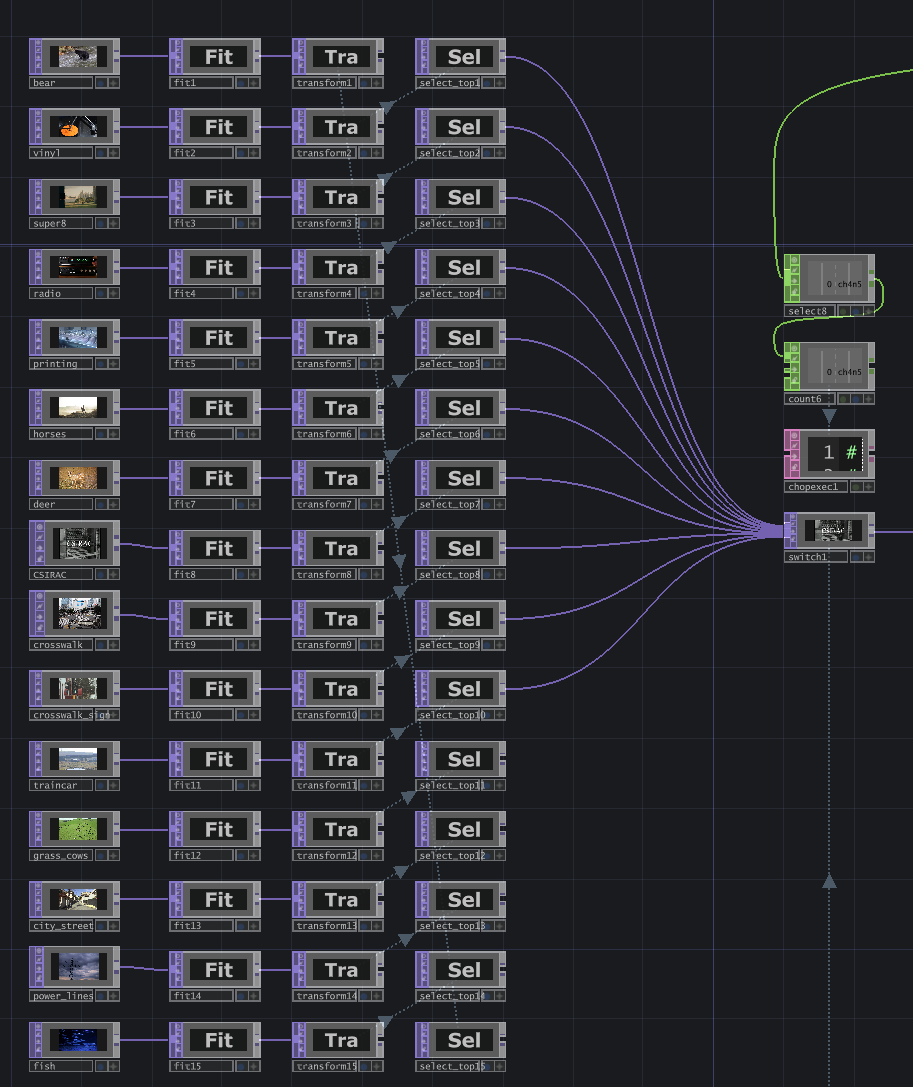
Each video clip had a different size, so they all went through a fit TOP to be resized to 1920x1080 px. Then they went into a transform TOP, where most stayed the same, but some were scaled down and translated slightly on the x and y axes. Finally, they were fed into select TOPs (which were supposed to update based on select_index, but I forgot to implement that).
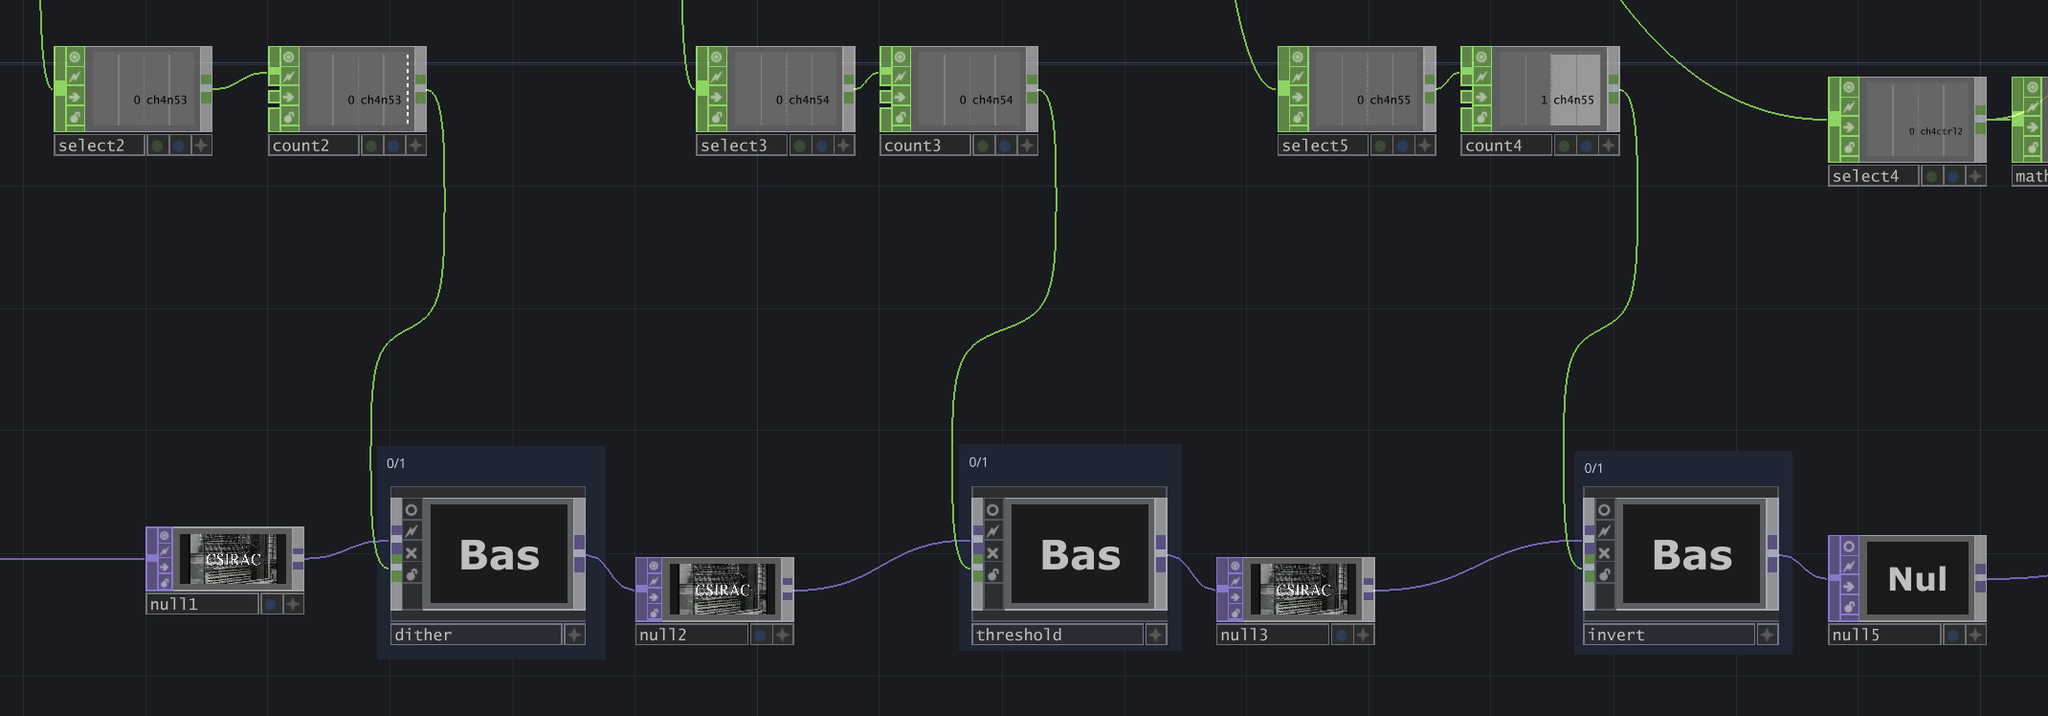
The first three effects are dither, threshold, and invert. For each effect, the previous effect's output is fed as input. There is a switch inside each one that will either output the input with no changes, or will apply the necessary changes. This switch is determined by the corresponding MIDI channel.
Dither applies a dithering effect (from this tutorial), Threshold passes the input through a threshold TOP and applies a subtle feedback opacity effect, and Invert simply inverts the colors.
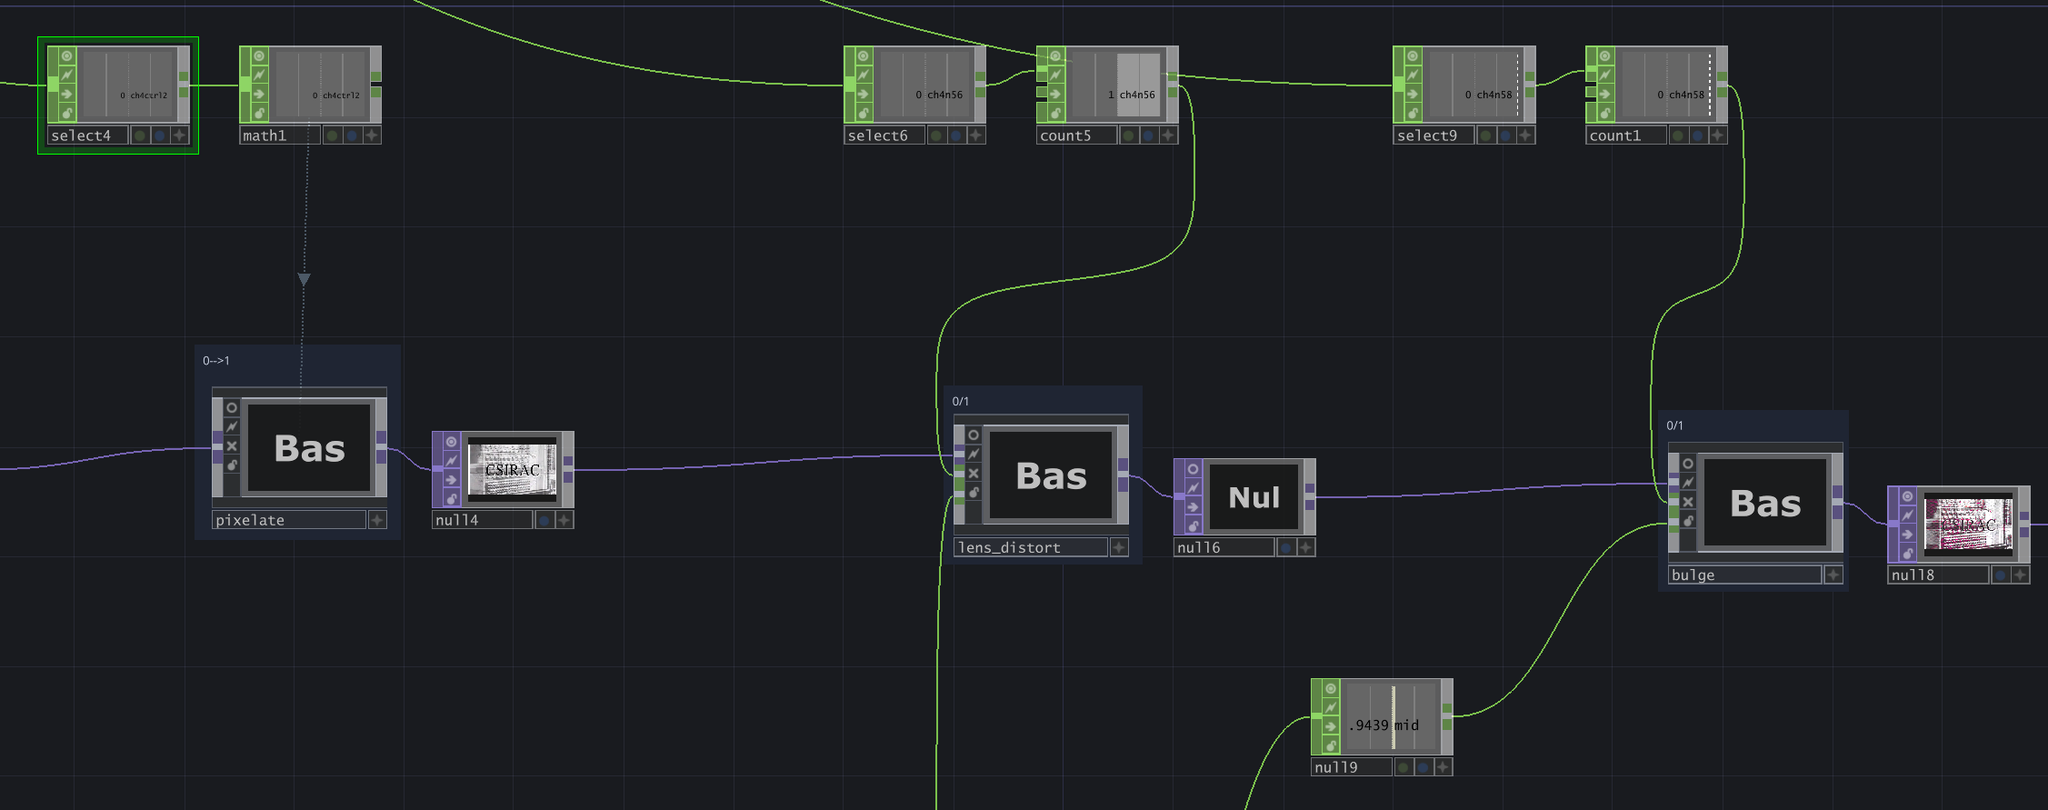
The pixelate effect utilizes a knob on the MIDI - the knob value goes from 0 to 127, but I used a math to map this to a range of 0 to 1. The lens distort and bulge effects are turned off and on using MIDI pads.

This lens distort effect is my favorite, but I think it's what's slowing down my network the most. The feedback loop uses the audio's mid channel to switch between two options: a transform TOP that translates the video by 0.03 (fractional units) on the x-axis, or an edge TOP that creates a hot pink edge tracing. This output is fed into a lens distort, with both K1 and K2 set to -0.375. The composite TOP that completes this loop is using the Pinlight operation.
I also set it up so that each time the MIDI pad is pressed, the feedback loop pulses to reset. This is for personal preference, since I like to see how a feedback loop looks when it gets started.
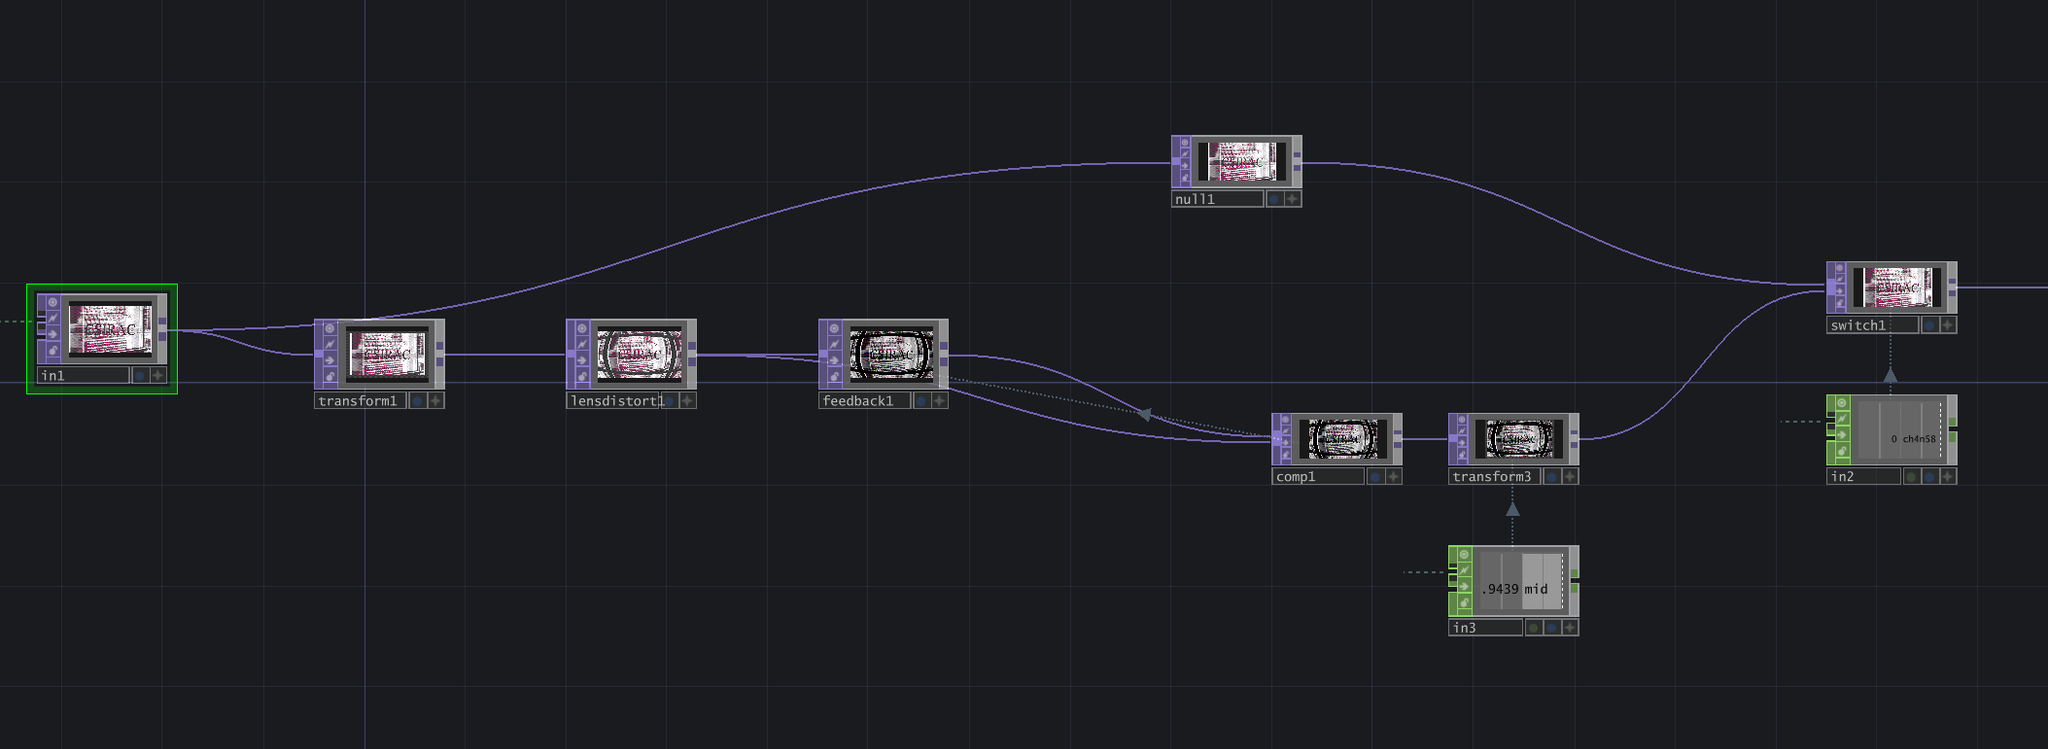
For the "bulge" effect, I also used a lens distort. However, to create the mirrored "disco ball" effect where the image continues, I combined a transform TOP (scale = 0.9, extend = 0) and a lens distort TOP (K1 = 1, K2 = 1, K3 = 1, layout = scale to fit, extend mode = repeat). For the feedback loop, I didn't apply any additional effects, just feedback TOP + composite TOP (operation = Chroma Difference).
For a bouncing effect, I used the audio's mid channel to scale this image between 0.9 and 1. It's a small range, but creates a noticeable effect that is timed to the audio.
This was a very fun project! If you've read all the way down here, I appreciate you. :)