
I created this mini visual for "Curse is Lifted (Club rmx)" by Bassvictim after listening to it obsessively for a week. Using TouchDesigner, I implemented several feedback loops that layer noises, lens distortions, and other effects, then switched between them at manually-selected timestamps.
mini lyric video for "Curse is Lifted" by Bassvictim, created by Grace Manning
Let's break down this TouchDesigner network:
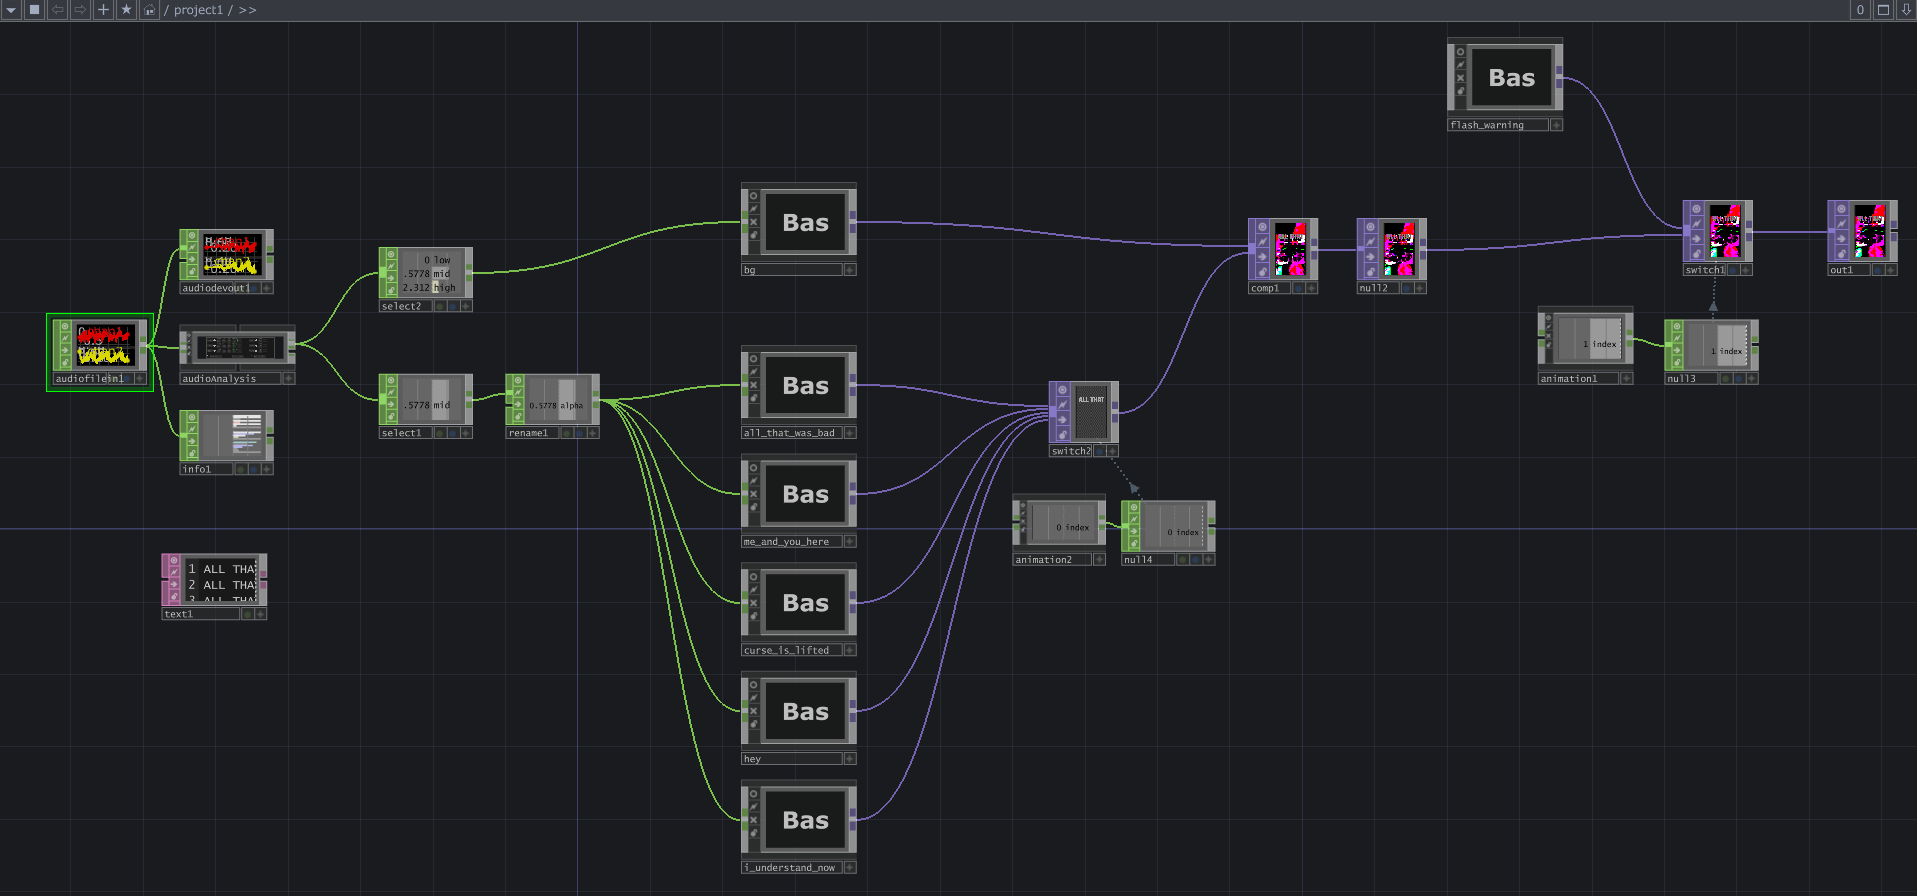
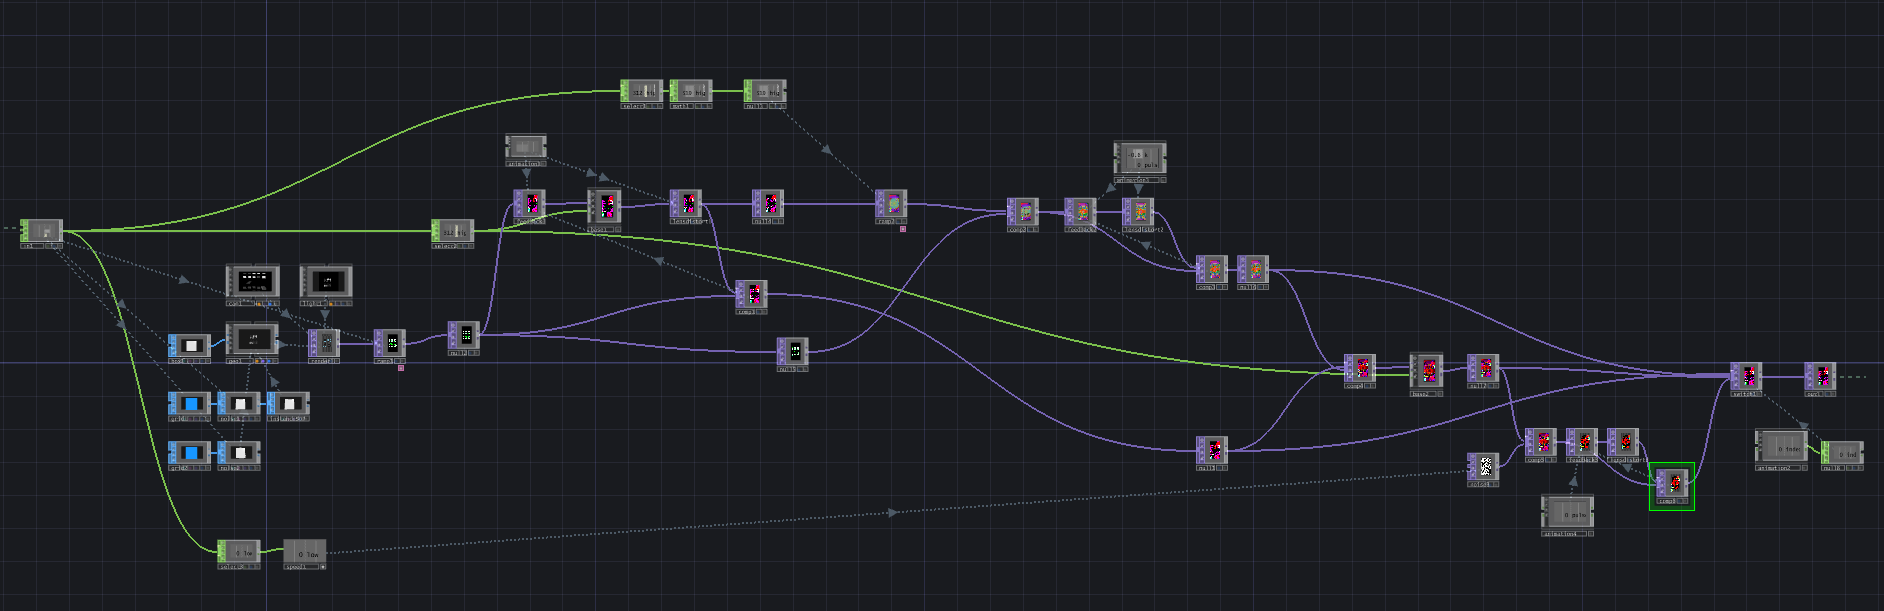
First, let's look at an overall view of the network as a whole. Below is a screenshot of the network, starting from an Audio File In CHOP and ending with an Out TOP. Let's zoom in closer.
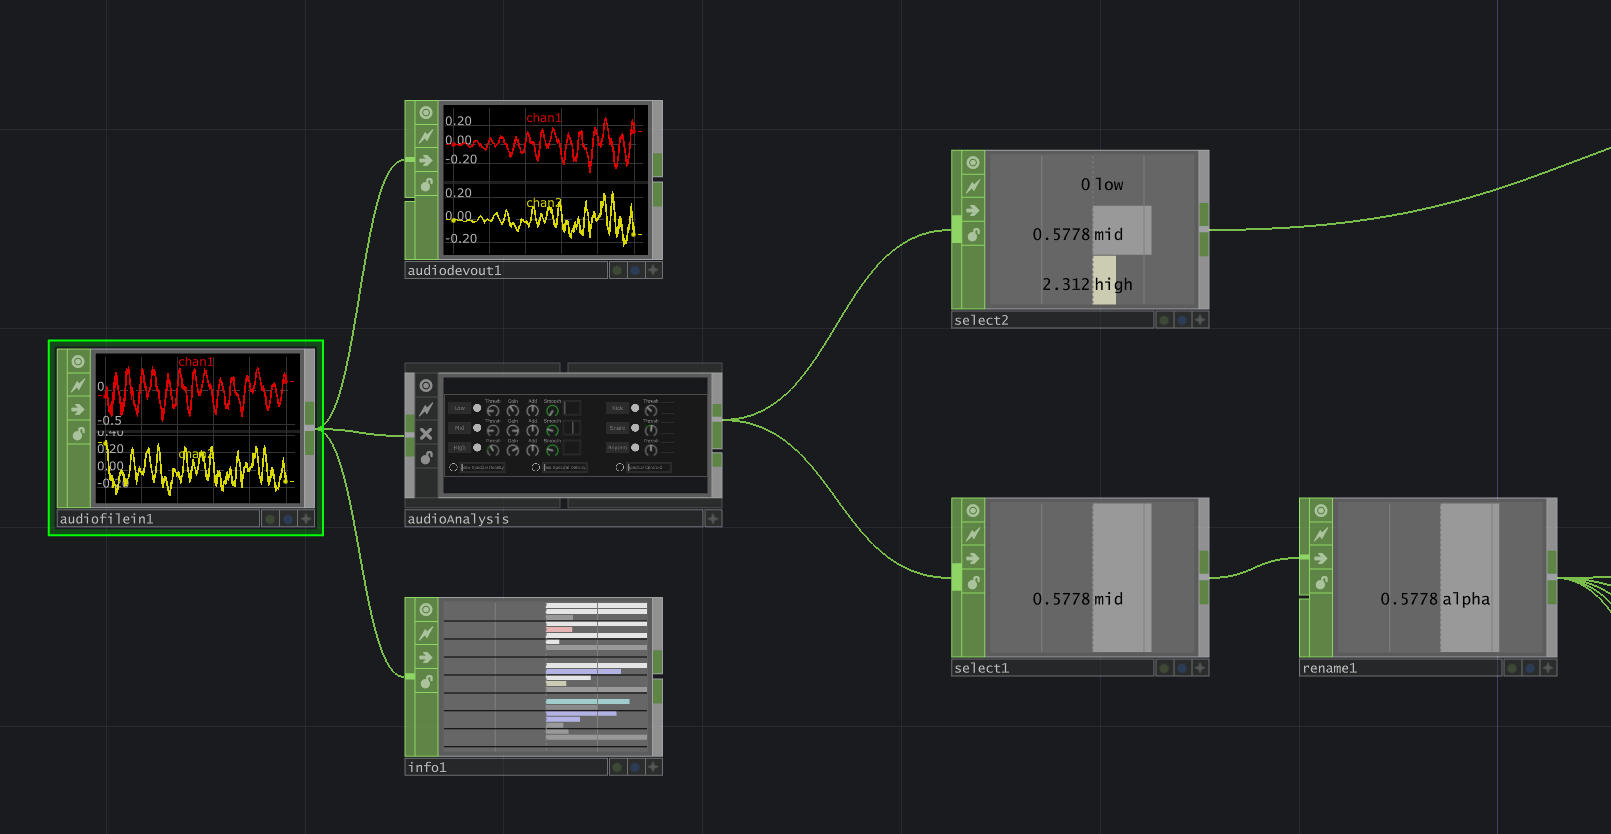
Below are the audio processing CHOPs in this network. We start with an Audio File In CHOP to load the audio file and control the playback starting point. It feeds into three other CHOPs:
- Audio Device Out, which plays the audio out of my computer speakers
- Audio Analysis, which separates out different channels of the audio, such as low/mid/high and kick/snare/rhythm
- Info, which provides information like the audio file's length in number of frames.
I utilized a Select CHOP to pull out the low, mid, and high channels and feed these into the bg Base COMP. I used a second Select CHOP to pull the mid channel, renamed it to alpha, and fed that into the lyric animation Base COMPs to use as an alpha channel. I found that the mid range values were exactly what I was looking for to control the text alpha value perfectly.
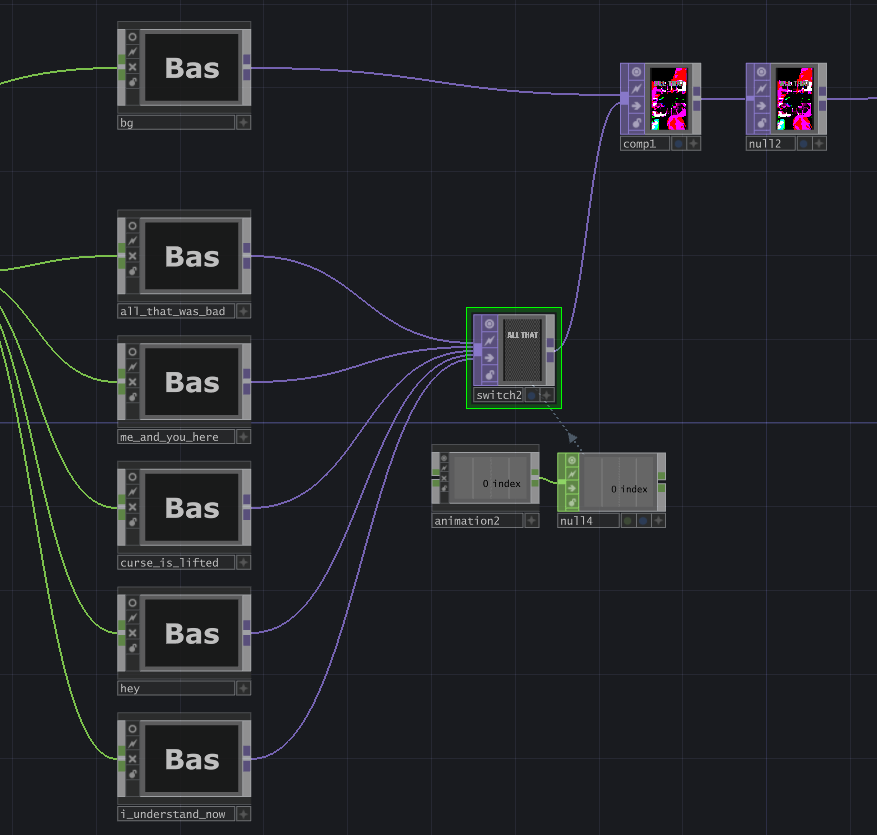
The background visual is stored within a Base COMP named "bg", and the text for the lyrics are stored within their own individual Base COMPs. A Switch TOP decides which lyrics are being shown in the visual, controlled by an Animation COMP to time the switching.
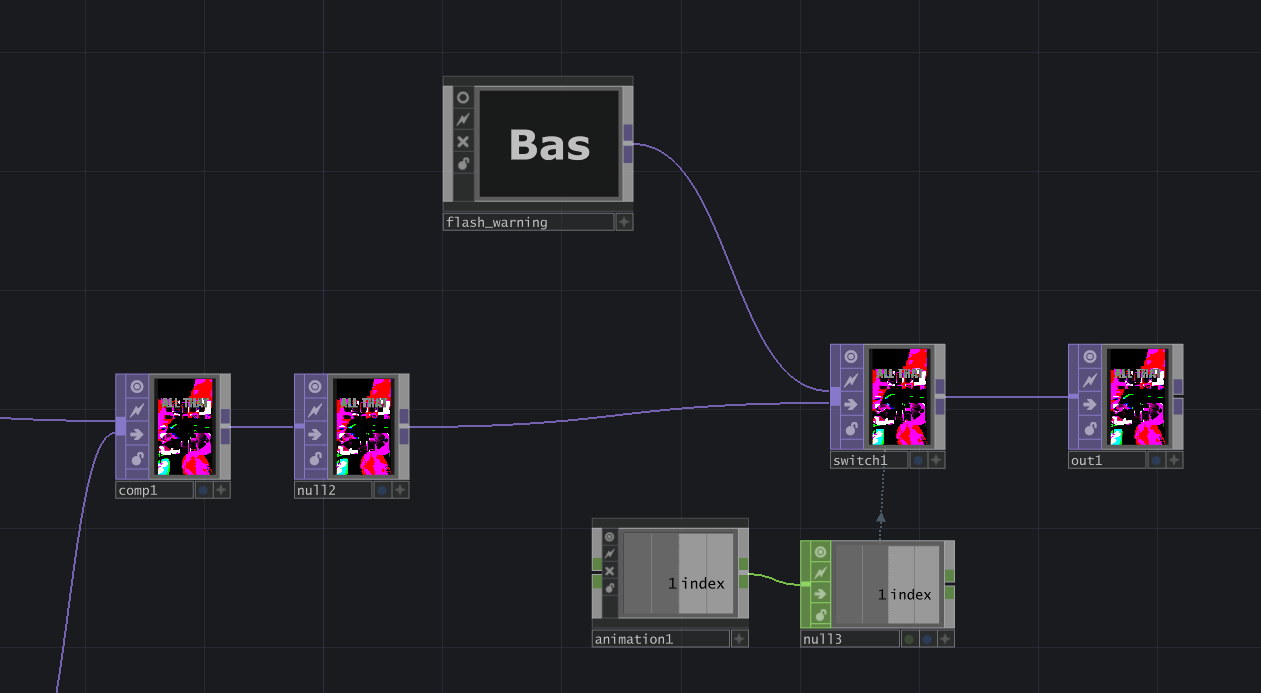
The final part of this network is a Switch TOP that switches between the flash warning and the visual. Its timing is controlled by another Animation COMP.
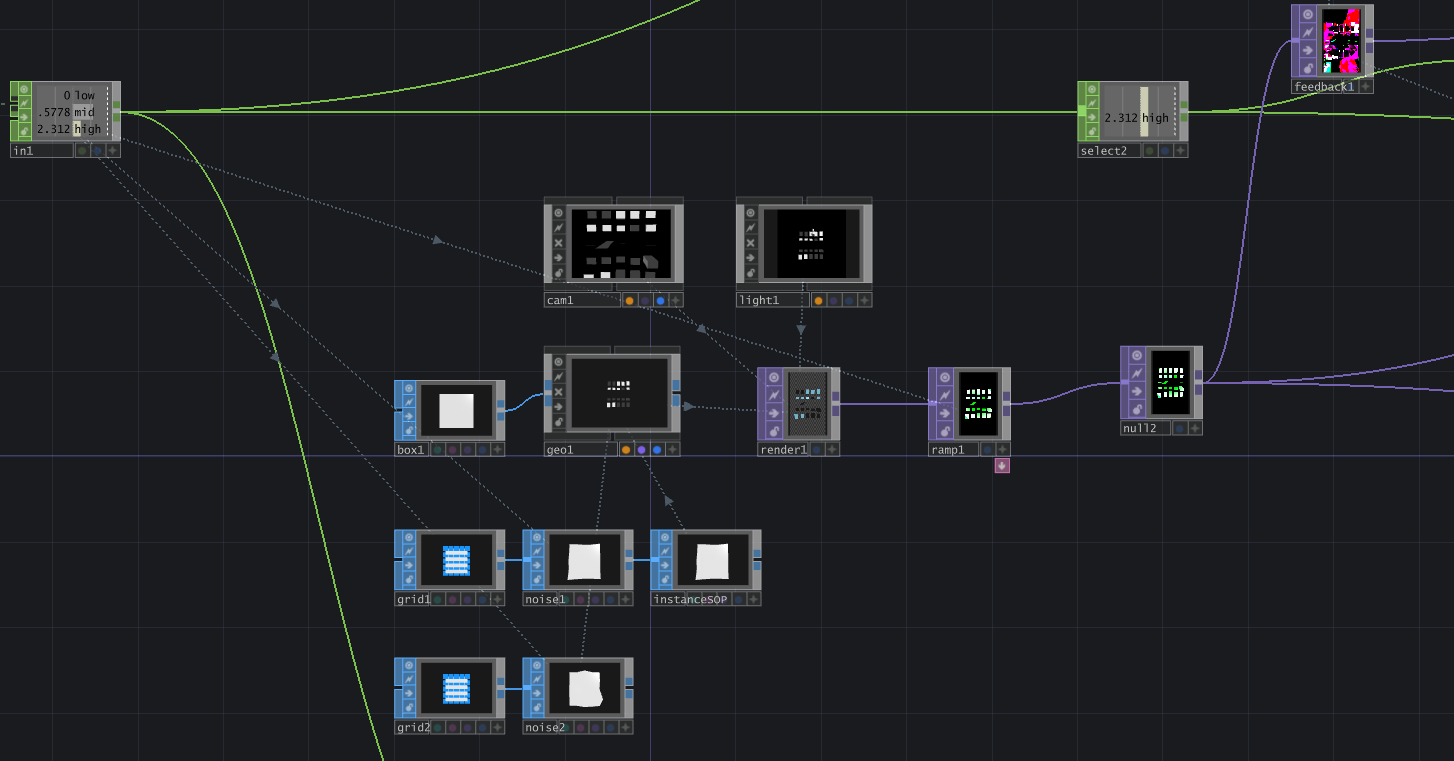
Let's dive into the "bg" Base COMP, which handles the background visual throughout the video.
Okay so...yes that's a mess. Sorry! When I get in the zone, I throw organization out the window. But let's take a closer look and try to make sense of the chaos.
The background visual starts with a box SOP connected to a Geo COMP for instancing. We have two grid SOPs, both being fed into a Noise SOP. Both Noise SOPs are being transformed by the mid audio channel in the Translate Z parameter. The first grid is used as an instancing OP for positioning (Translate X, Y, Z). The second grid is used as an instancing OP for scale (Scale Y, Z). The layering of these two instancing OPs ensures that the boxes don't disappear when the scale is 0.
The SOPs are rendered using a basic Camera COMP + Light COMP + render TOP setup, then a Ramp TOP is applied to add a green-to-white circular gradient, and then a null TOP is attached so we can use (and reuse) these grid boxes throughout the network.
Now we begin a network of feedback loops, consisting of taking a null TOP, feeding it into a Feedback TOP, applying some sort of transformation, and feeding that into a Composite TOP along with the original null TOP. The first transformation applied is hidden within a Base COMP, but it involves bringing several new rectangular shapes into the visual, displacing them using the original visual, then compositing them together.
I also utilize a lot of Lens Distort TOPs, specifically decreasing the K1 and K2 values, in feedback loops. This provides the illusion that the visual is coming towards the camera (or the camera is moving forward through a tunnel).
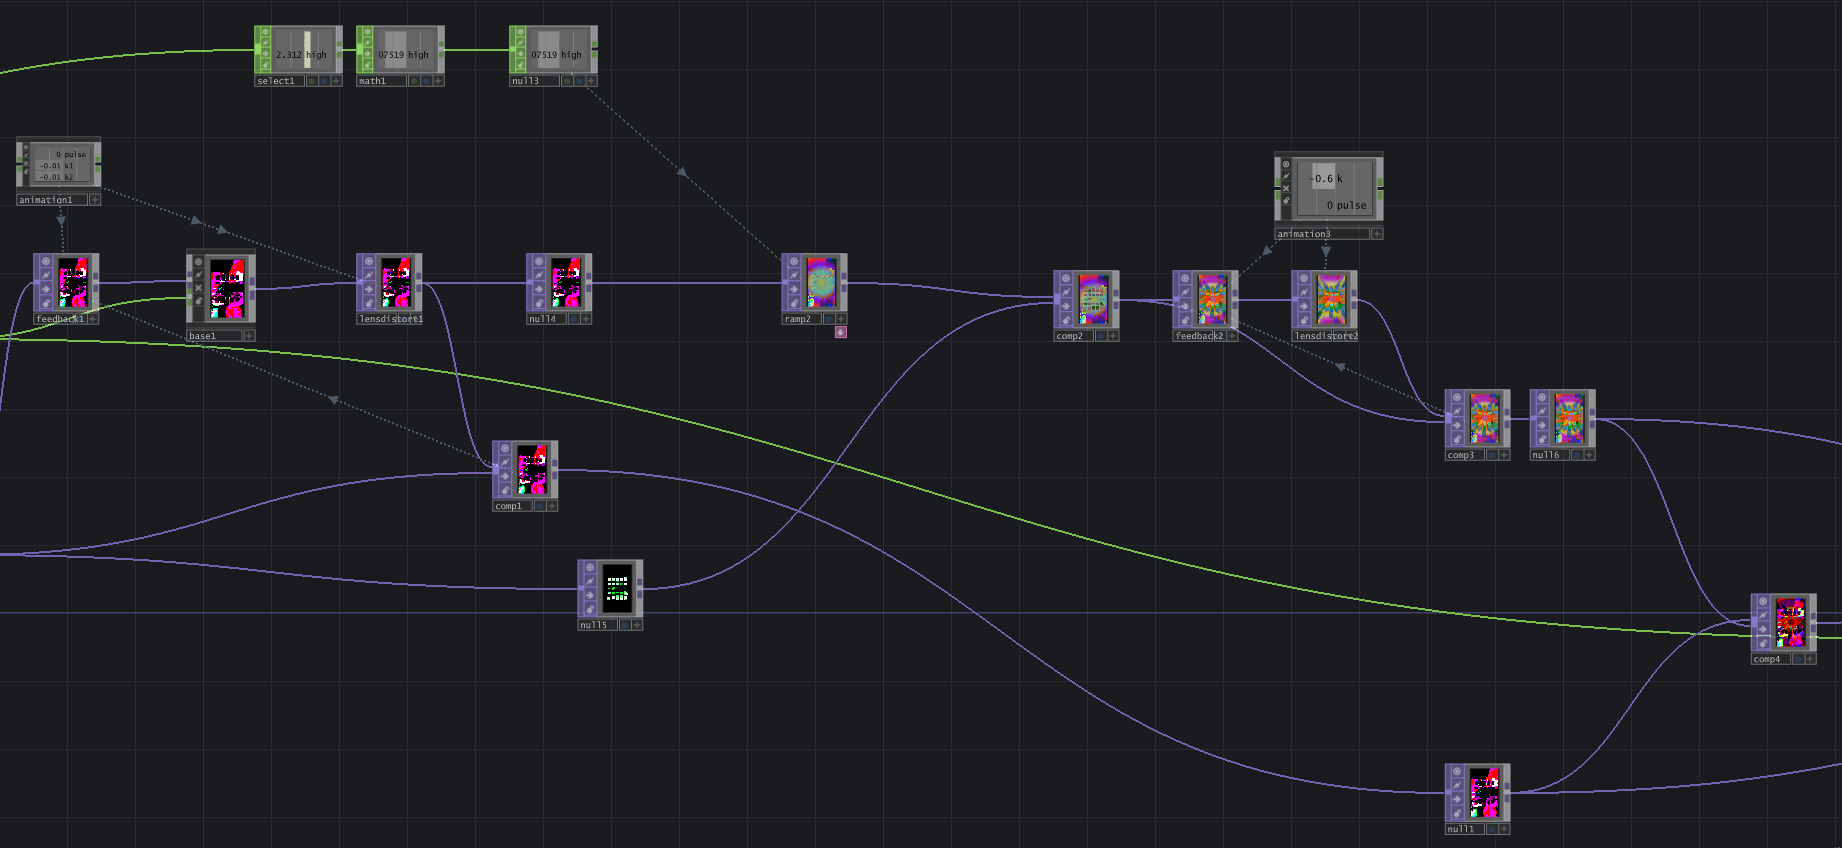
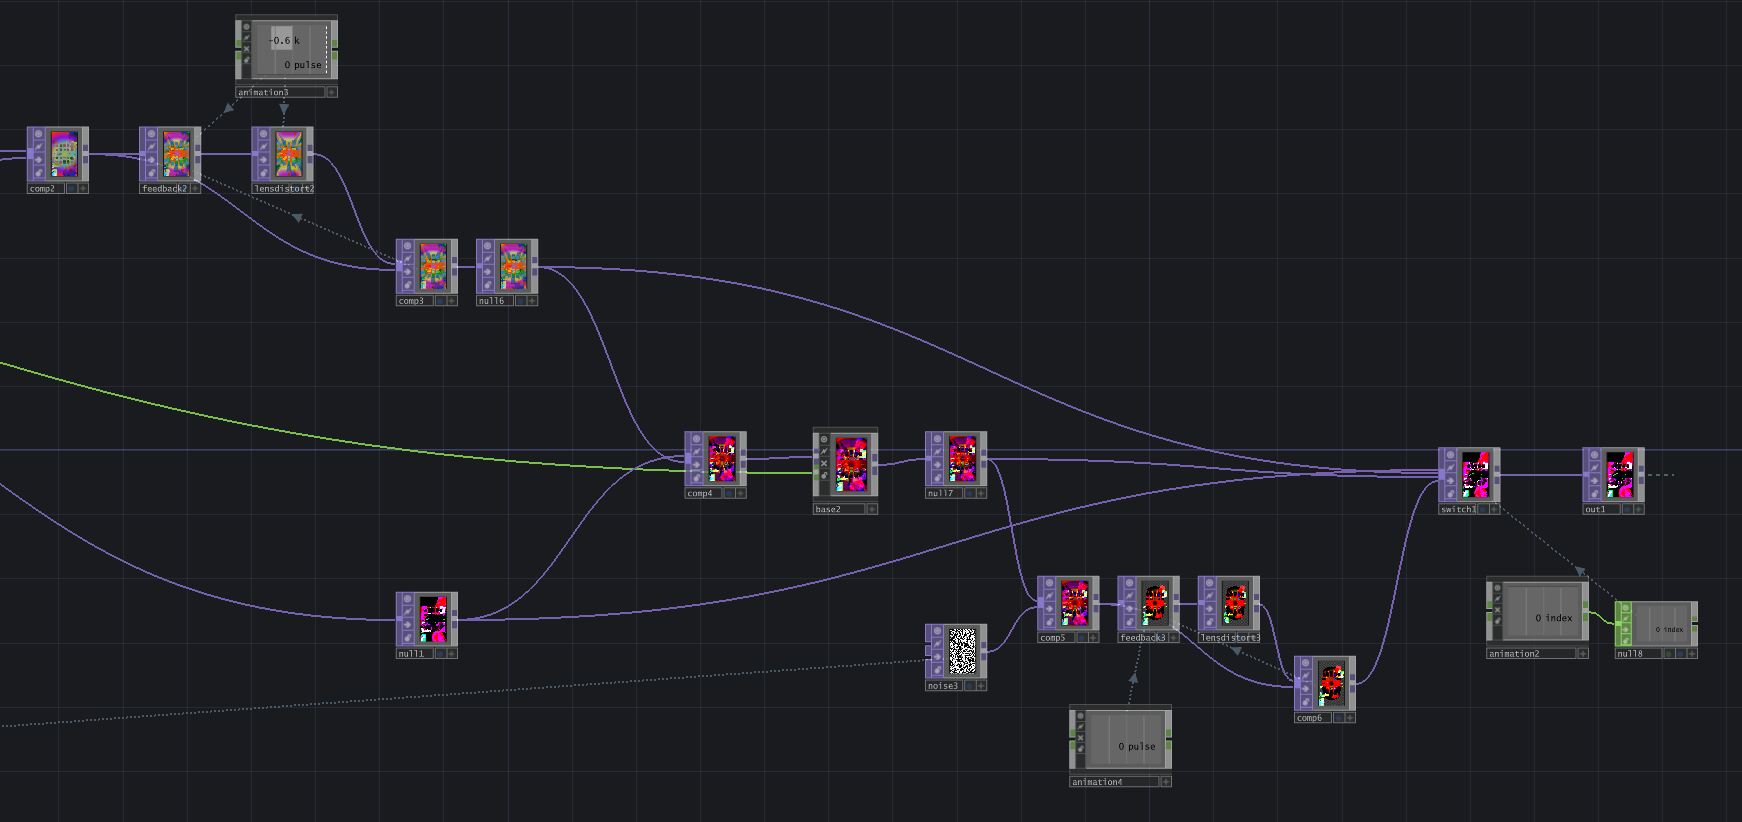
To create different scenes that flow together, I take the output from one feedback loop and use that as the input for the next. Then I use Animation COMPs to pulse the feedback at the exact moment that we switch to display that scene, thus allowing the feedback effect to be visible to the viewer. This allows for a seamless transition between scenes where we can watch the feedback over take the previous scene and transform into a new one.
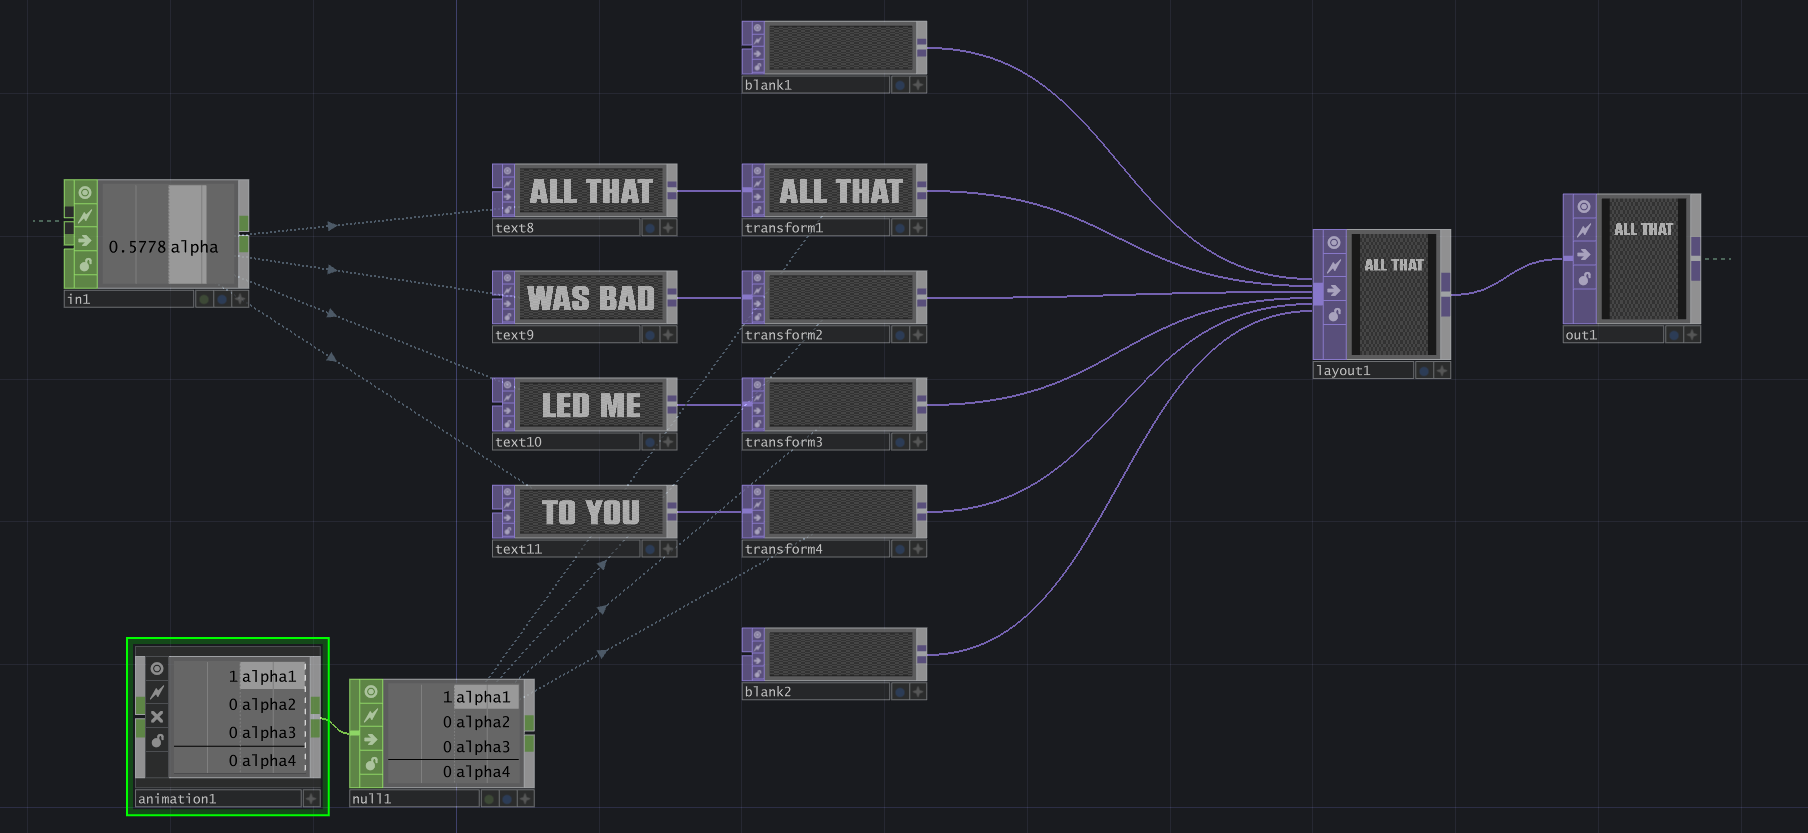
With all the background visuals complete, let's move on to the lyric display. I wanted each line of text to appear one at a time as they were spoken in the song. Therefore, each line was its own Text TOP, which was fed into a Transform TOP, and finally into a Layout TOP to put them all together.
The alpha channel (AKA the "mid" audio channel) was used to make the Text TOPs' opacity fields audio-reactive. However, I also wanted each line to appear at a specific time, so I used an Animation COMP and created an alpha channel for each line, which was referenced by the alpha channel in the Transform TOP. This value went directly from 0 to 1, making the words appear instantaneously at a manually-selected time.
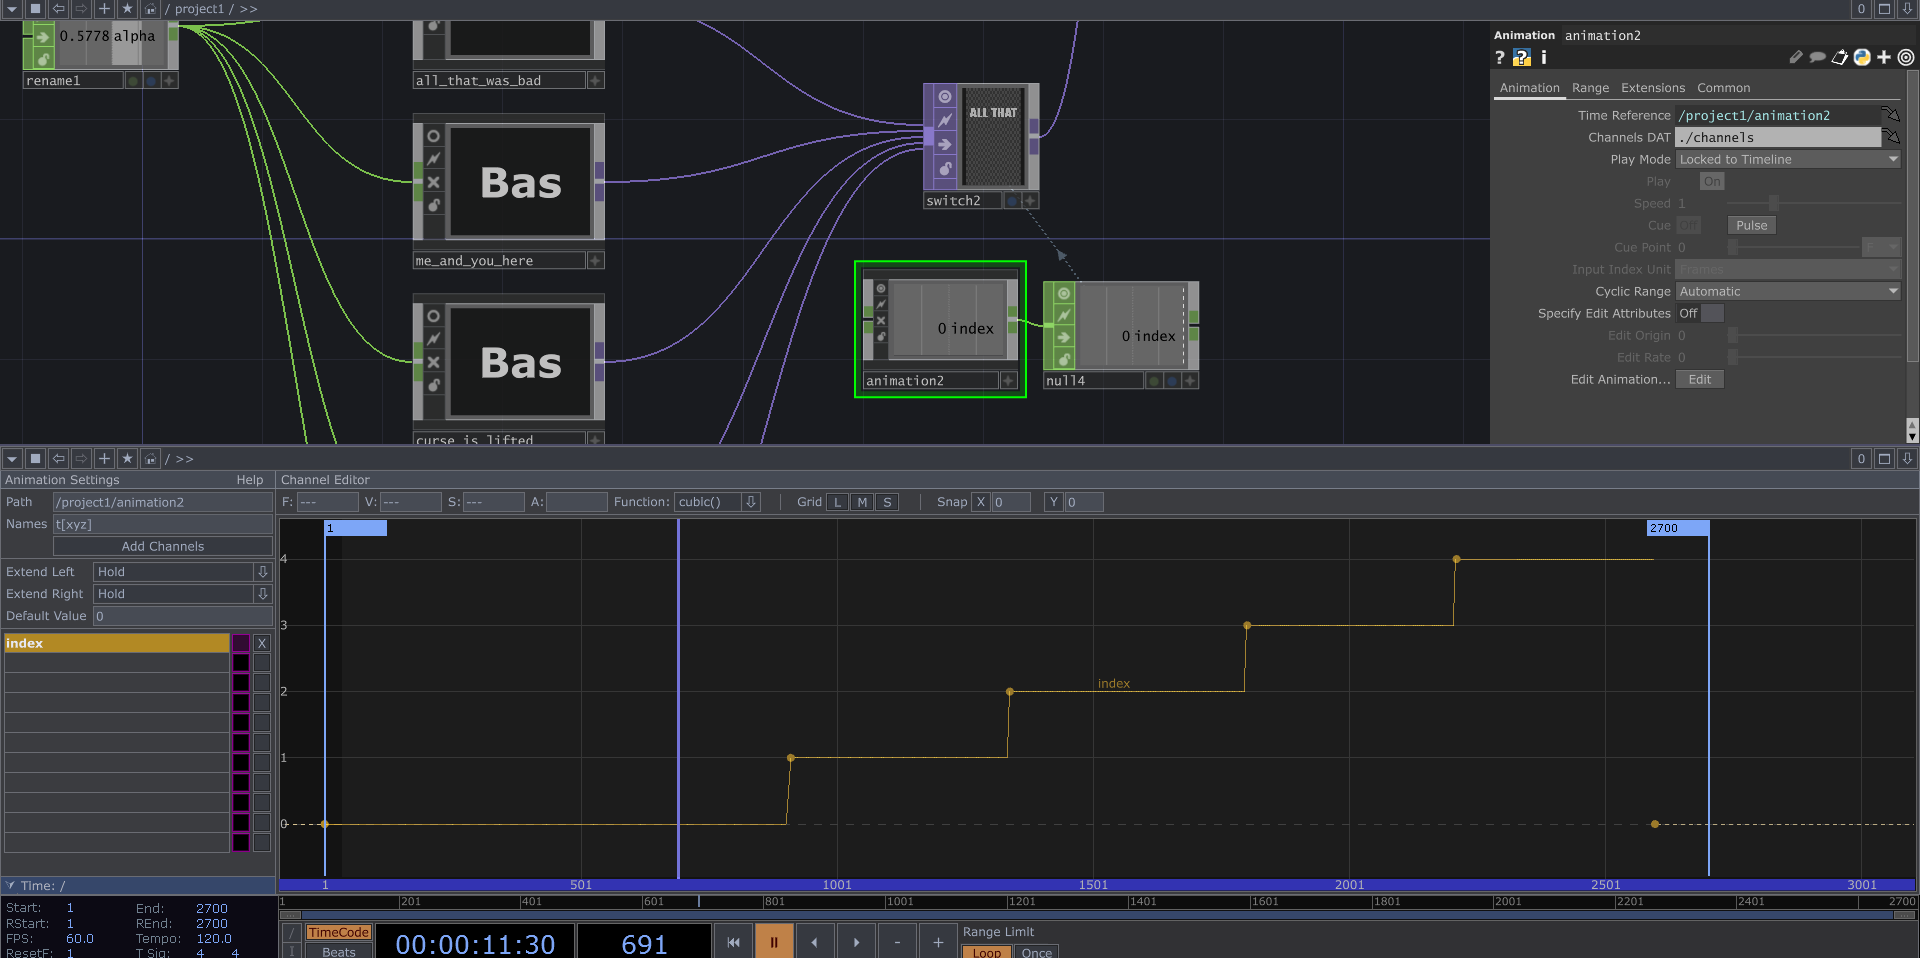
Now let's zoom back out into the main network and inspect the Animation COMP which controls the switching between lyrics. I used a channel called "index", and set the function to constant. This value is referenced in the Index parameter of the Switch TOP, so it changes lyrics when the value increments.
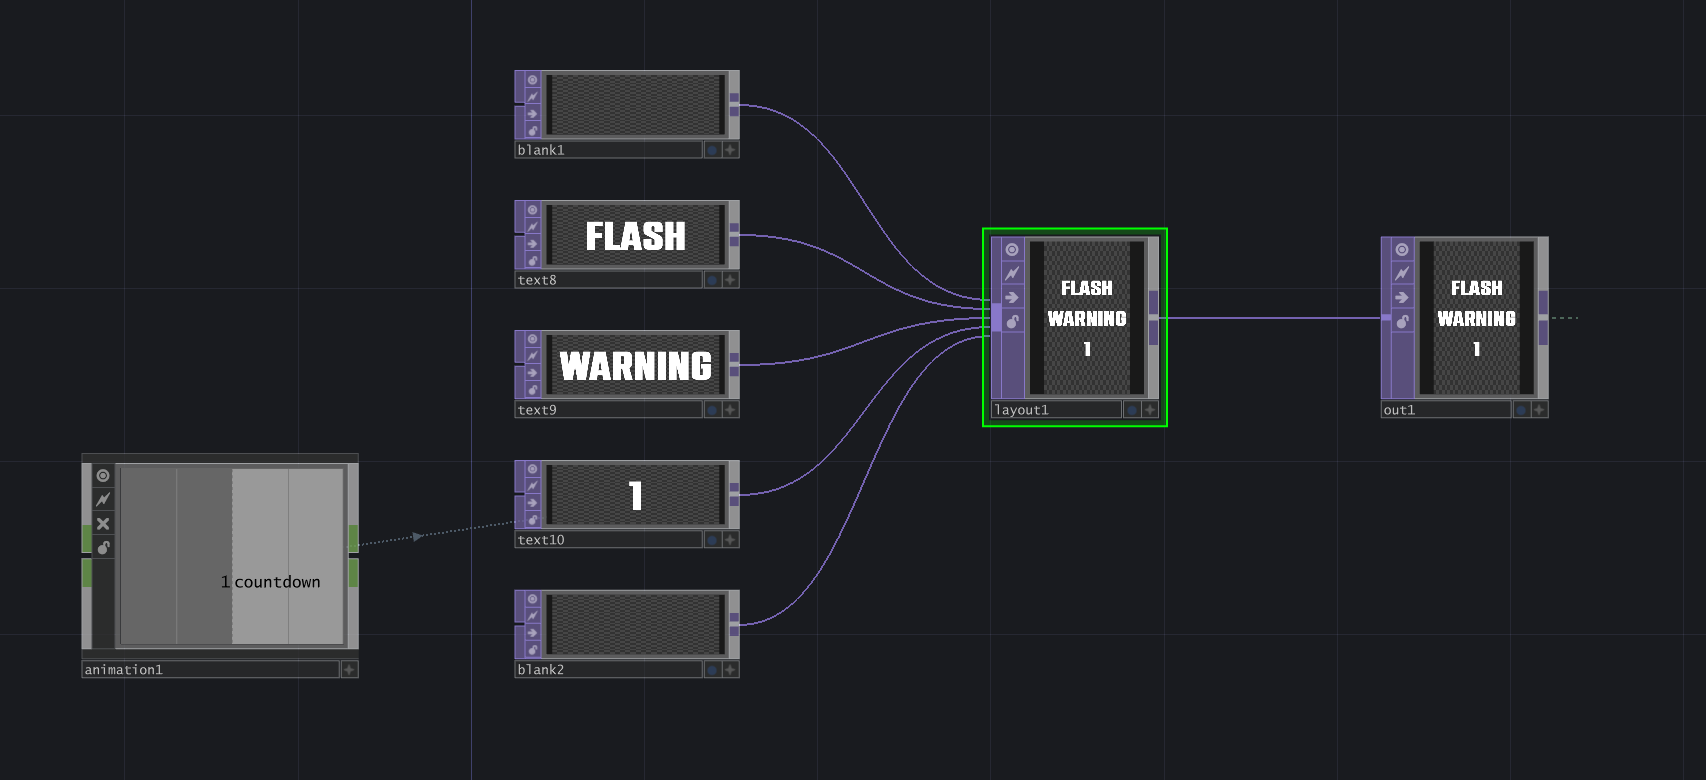
Lastly, we can take a look at the Flash Warning component. This utilizes several Text TOPs and a Layout TOP, but the number countdown is referencing an Animation COMP channel called countdown. I manually configured this channel to decrement from 5 to 1 in 5 seconds. Looking back on it, I could have used a Timer CHOP, but I wasn't super well-versed in that at the time.
As always, this was a fun practice project. It took about 3.5 hours to make as it was my first time attempting SOP Instancing without a tutorial. If you made it this far, thanks for reading!