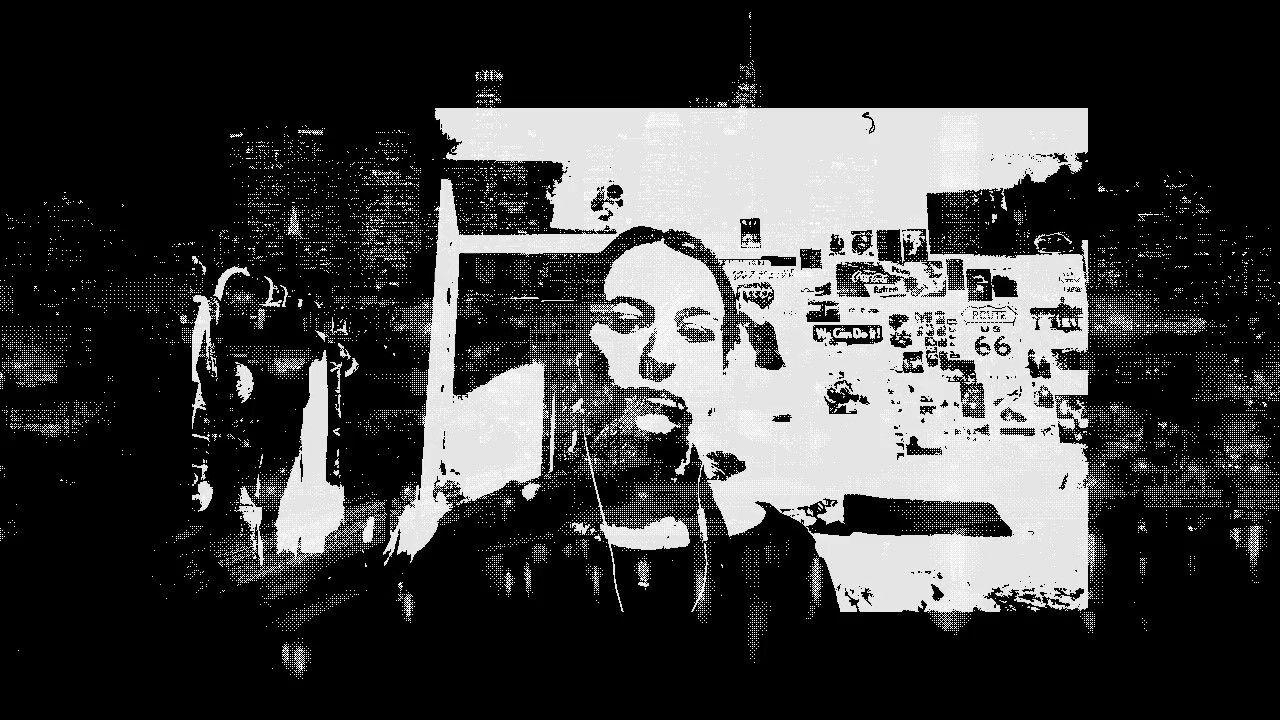
This visual features videos of myself from different years throughout my life, flickering between them using audio signals. One of the clips was filmed by my mom on our family video recorder, the other was from when I got my first cell phone, and the rest are "video updates" I've recorded on my laptop since I started college.
"Versions of Myself", 2025
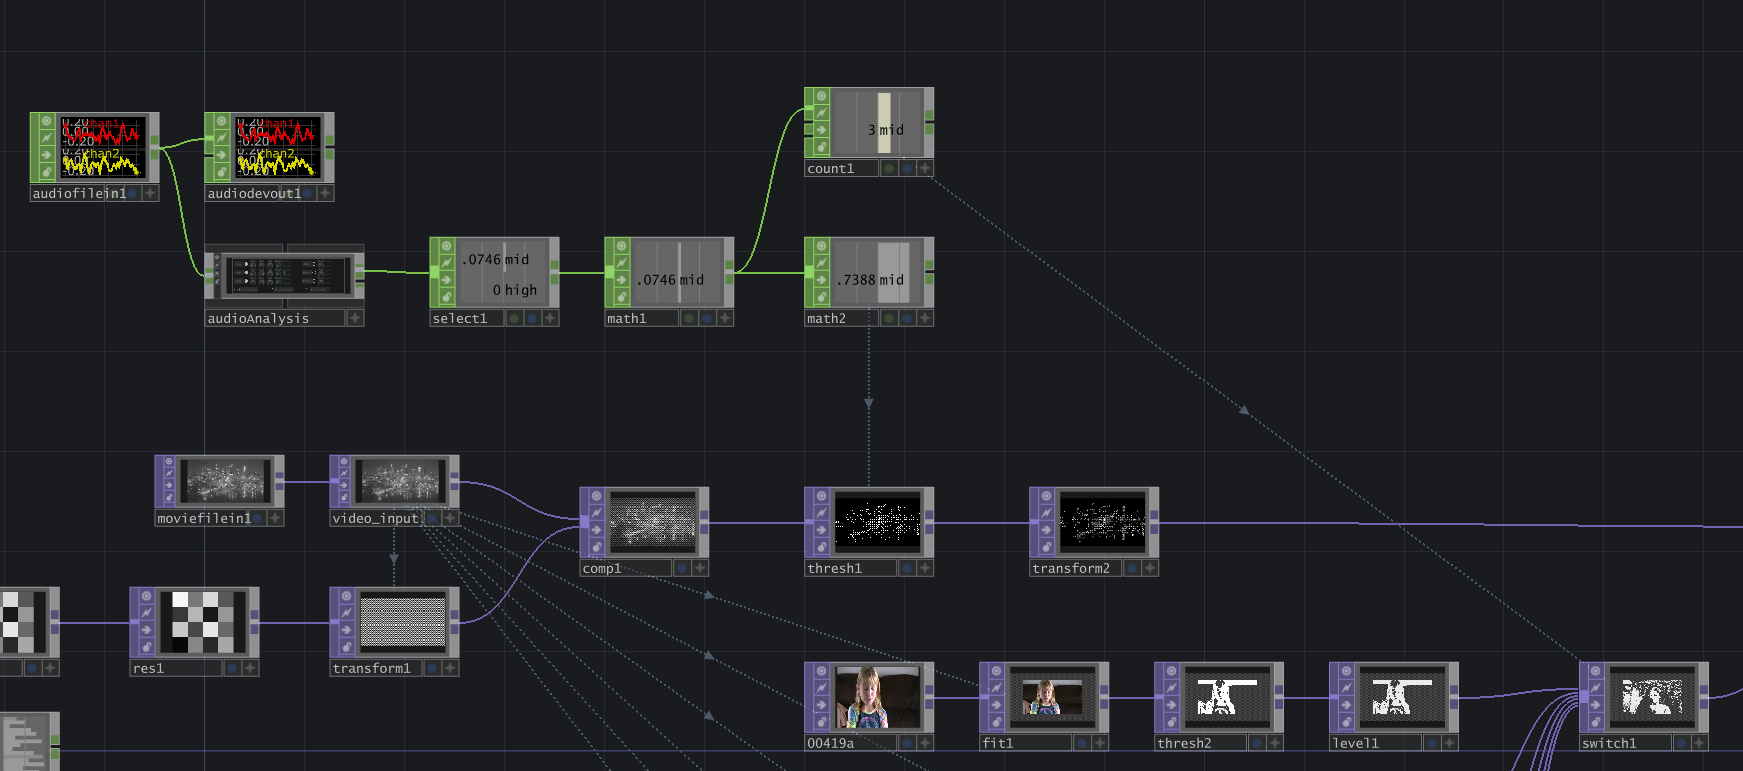
Here's a quick breakdown of the TouchDesigner network:
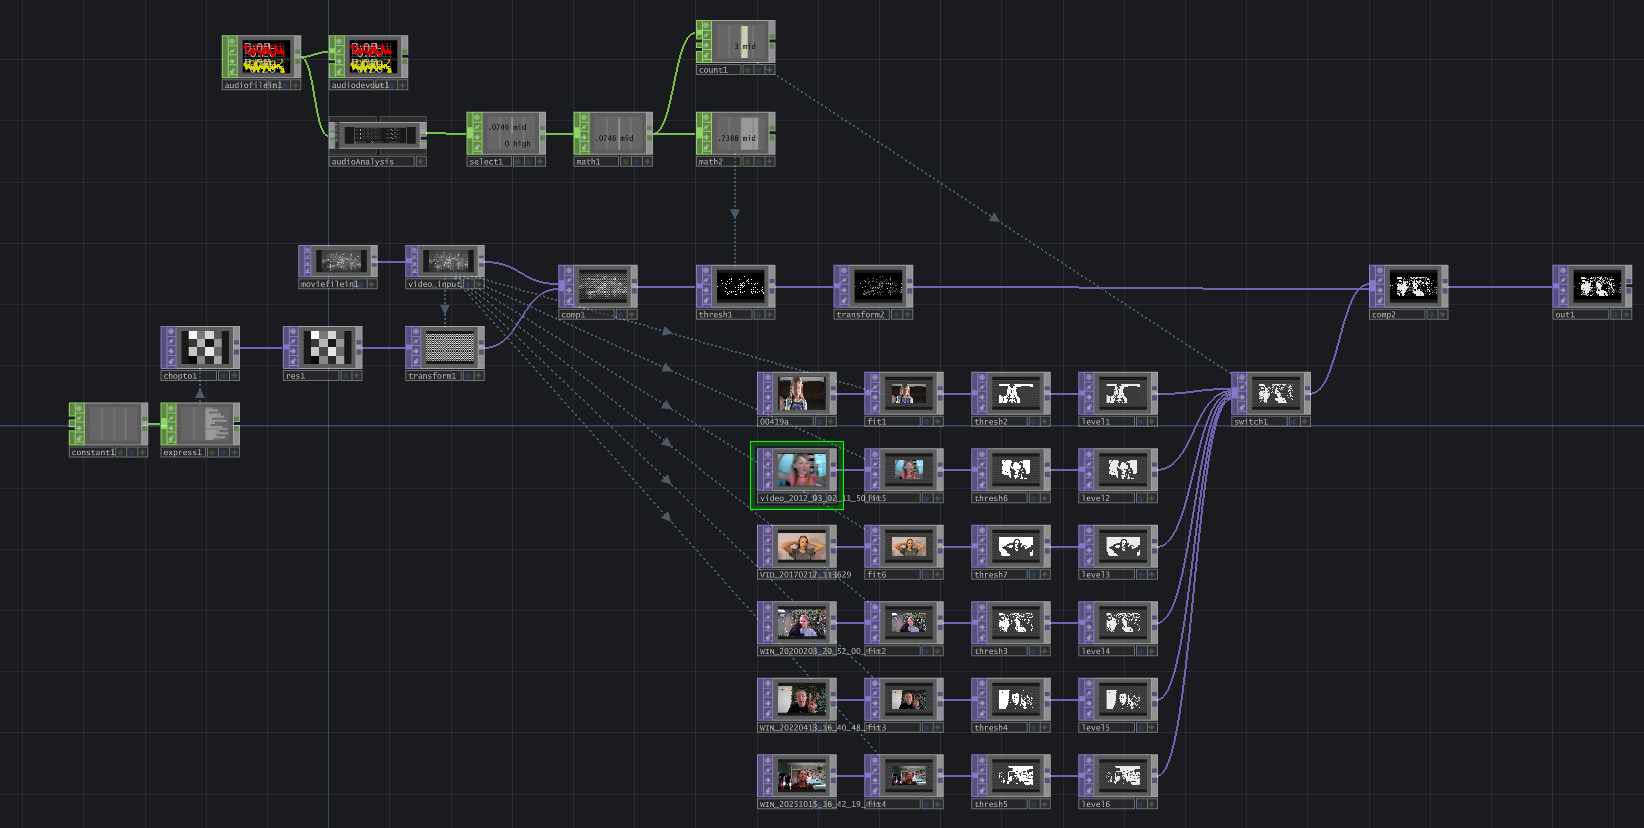
The TouchDesigner network can be broken down into these parts: 1) setting up a dither effect for the background image; 2) processing the video inputs and compositing with the background image; 3) utilizing audio input for audioreactive changes.
For the dither effect, I used the technique shown in this YouTube tutorial by Distorted Mind Lab. It's super simple and effective. I used a Null TOP and named it "video_input" to create an easy reference to the moviefilein TOP. (By the way: this background image I'm using is actually from the TouchDesigner files library, titled "Raw1_1280x720_16bit.tif". It features the Downtown Los Angeles skyline from the perspective of MacArthur Park).
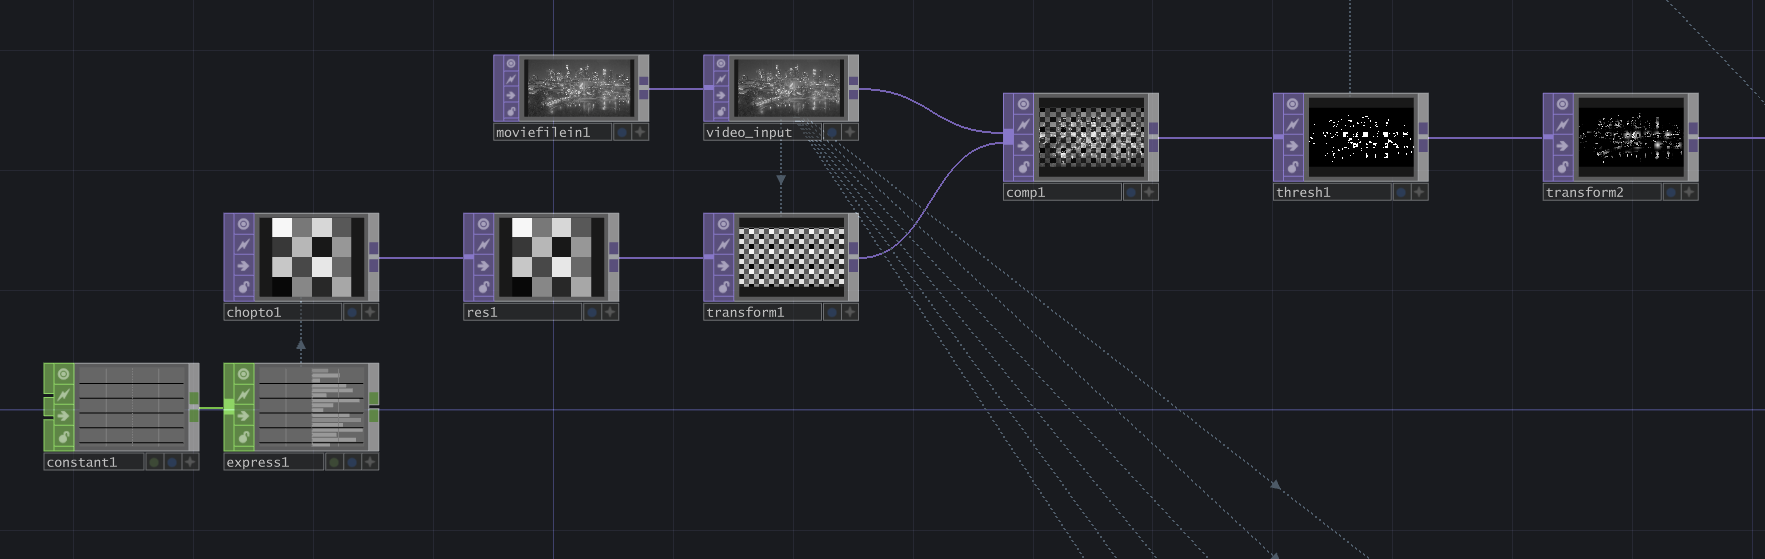
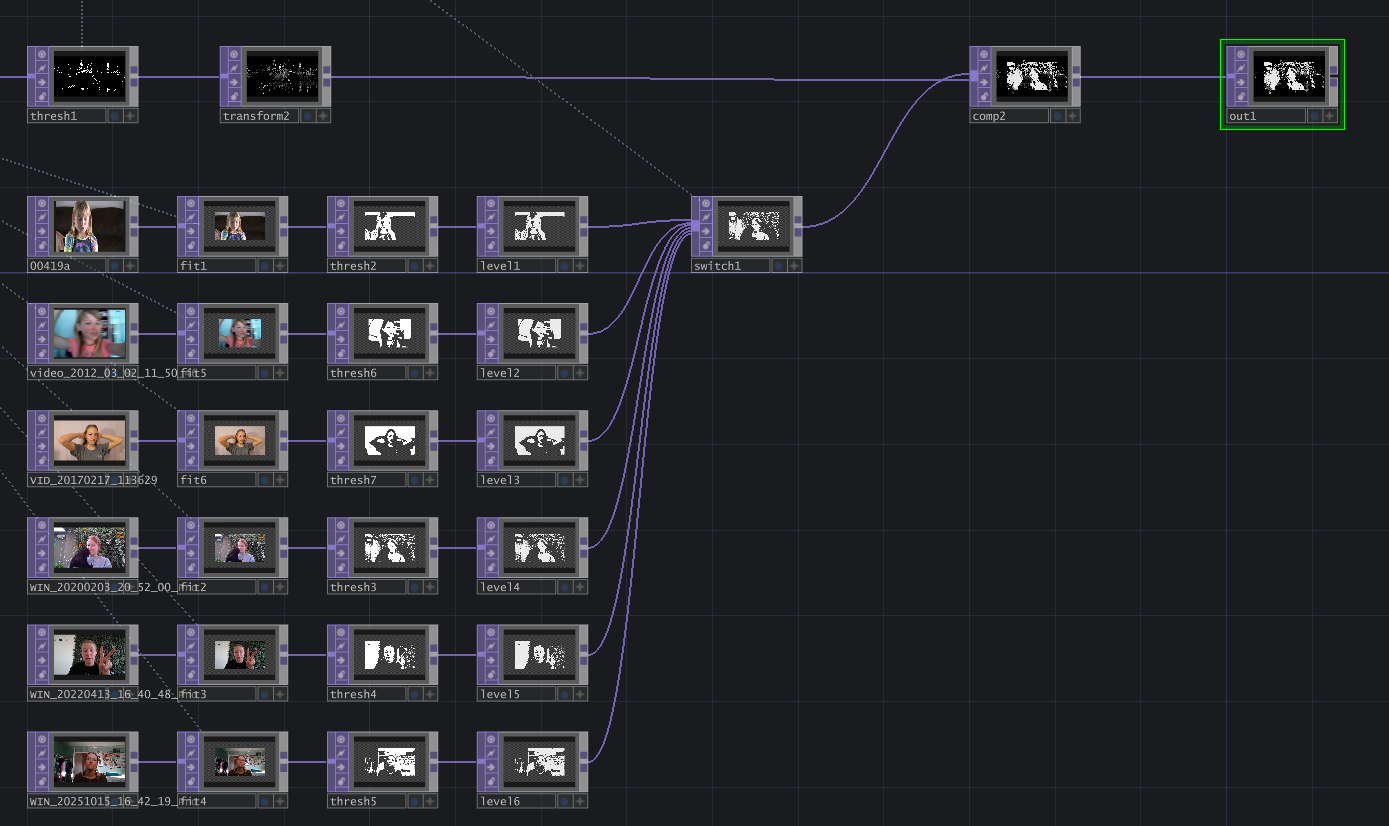
Next, I pulled in my six video clips, and fed each of them through these 3 operators:
- Fit TOP: set the Resolution using op('video_input').width and op('video_input').height.
- Threshold TOP: assigns a pixel value of 1 to parts of the image above the threshold, and a pixel value of 0 to parts below it (meaning it pulls out the lightness of the image and turns the dark parts transparent). Adjust the threshold based on each different input.
- Level TOP: set the Opacity to 0.9.
These are all fed into a Switch TOP, then a Composite TOP to place them on top of the background image (Operation = Maximum).
Lastly, I added some components to make this audioreactive, starting with an Audio File In CHOP to pull in the song "9999999999" by Locked Club. The audioAnalysis tool showed that the mid and high channels were the parts of the song where I wanted visual changes to happen. I added them together with a Math CHOP, then used the result in two ways:
- "count1" Count CHOP: with the Trigger Threshold set to 0, this count triggers whenever the input value increases (Trigger On = Increasing Values). I set the Limit to Loop Min/Max from 0 to 5 for the number of video inputs I'm switching between, and then referenced this value in the Switch TOP's Index. Thus, whenever the mid & high channels increase in value, it triggers a switch to another video layer.
- "math2" Math CHOP: this takes the range of the added mid & high channels from 0 to 1, and changes it to 0.75 to 0.6. I liked the effect it had going the other way around (rather than 0.6 to 0.75). In the Threshold TOP within the background visual dither effect, I set the Threshold to reference this value. Thus, it adds a grainy flickering effect that increases when the song mids & highs get more intense.
Thanks for reading! If you try this out, share it with me -- I'd love to see it.